This is my try at making a FAQ for new or old new users that just got an Atari ST.
The text of this FAQ is shared under CC BY-NC-SA licence except for the photos (you can share it and modify it, but you need to credit me and share your version under the same licence and no commercial use is allowed).
by Cyril Lambin/fenarinarsa
What is the Atari ST line of computers?
Not to be confused with the Atari video game consoles, the Atari ST is a 16/32 bits line of computers that started in 1985. The last model was discontinued in 1993. It was really popular in Europe.
You also must not confuse it with the Atari XL/XE line, which are 8-bits computers released before the ST. The Atari XE especially looks like a smaller Atari ST because they share the same design. The Atari ST line is not compatible with the Atari XL/XE line.
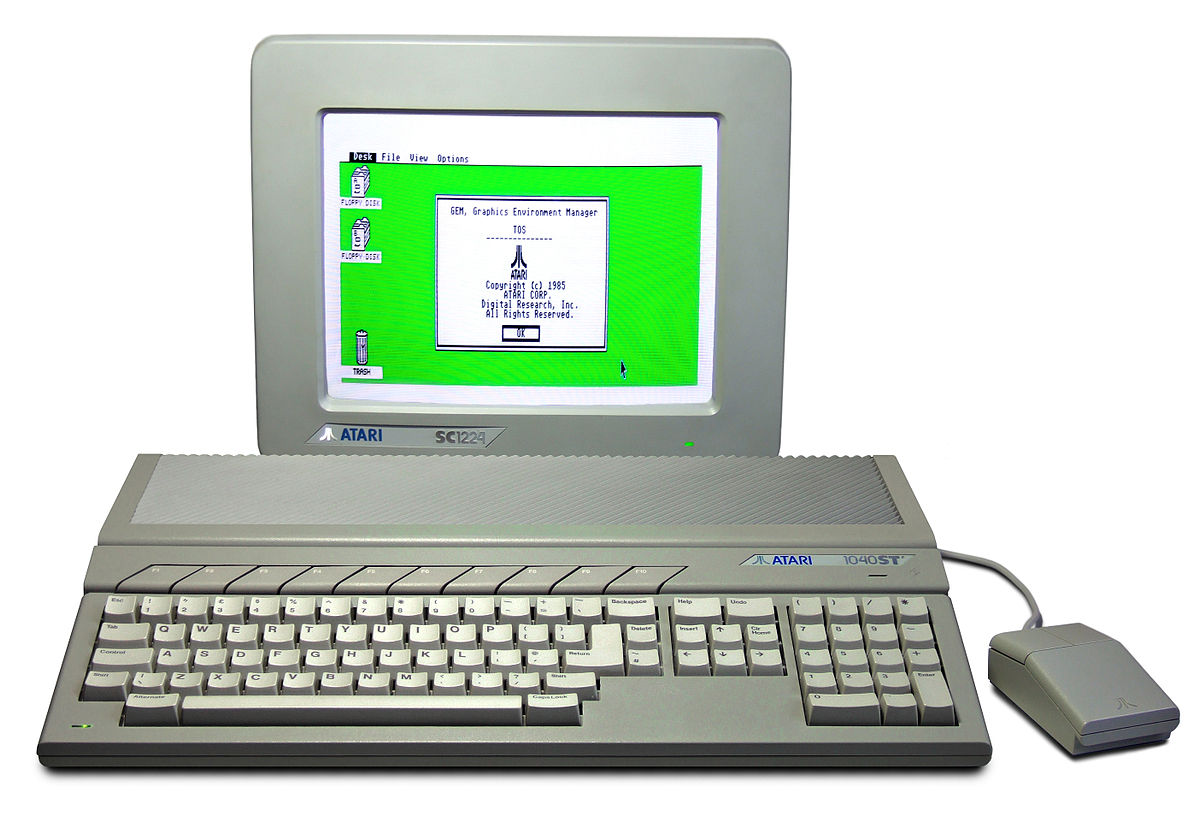
The Atari ST was a computer created very quickly in answer to Commodore buying the Amiga company but it featured a full graphical user interface with a mouse, something that was uncommon at the time.
Are there differences between models ?
The main difference between models is the available RAM and the builtin Operating System, which is stored in ROM chips (and so can’t be upgraded without changing those chips).
The name of the Atari ST’s operating system is TOS.
All ST models are based on a Motorola 68000 CPU running at 8Mhz and have the same color and monochrome video resolutions.
The STE and Mega STE have more graphic and audio capabilities (hardscroll, more available colors, PCM stereo sound).
Also, the Mega STE can run at 16Mhz.
But for all models, here are the main differences you need to look for:
- Available RAM (memory)
- TOS version in ROM
- Is a RAM expansion possible or not
- Is TOS upgrade possible or not
- Is it a US or European model
- Is there a composite output or not (if you need one)
What are the existing models?
Atari 130 ST
Prototype, I won’t cover it here.
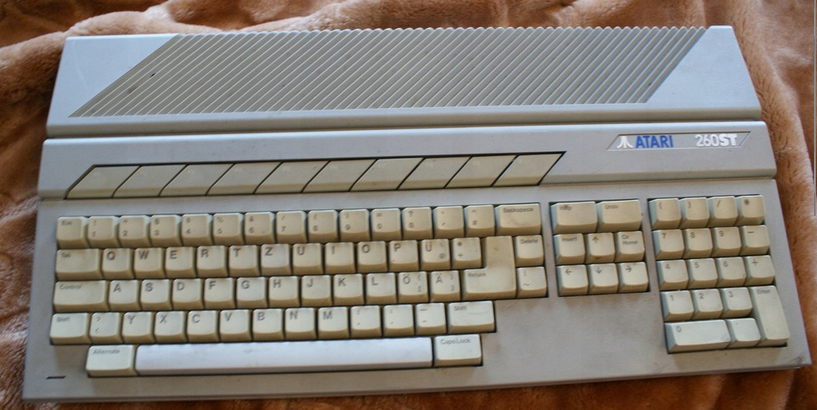
Atari 260 ST, 520 ST/ST+/STM
First released model, it’s shorter with an external PSU and external floppy drive. It’s quite rare, even more rare in some countries (like France).
The ST+ offered 1MB of RAM while the STM had a composite & RF video output.
RAM: 512kB (ST) or 1MB (ST+)
RAM expansion: not natively, max 4MB (solder required)
TOS version: 1.00
TOS upgrade: Yes, up to 1.04 natively
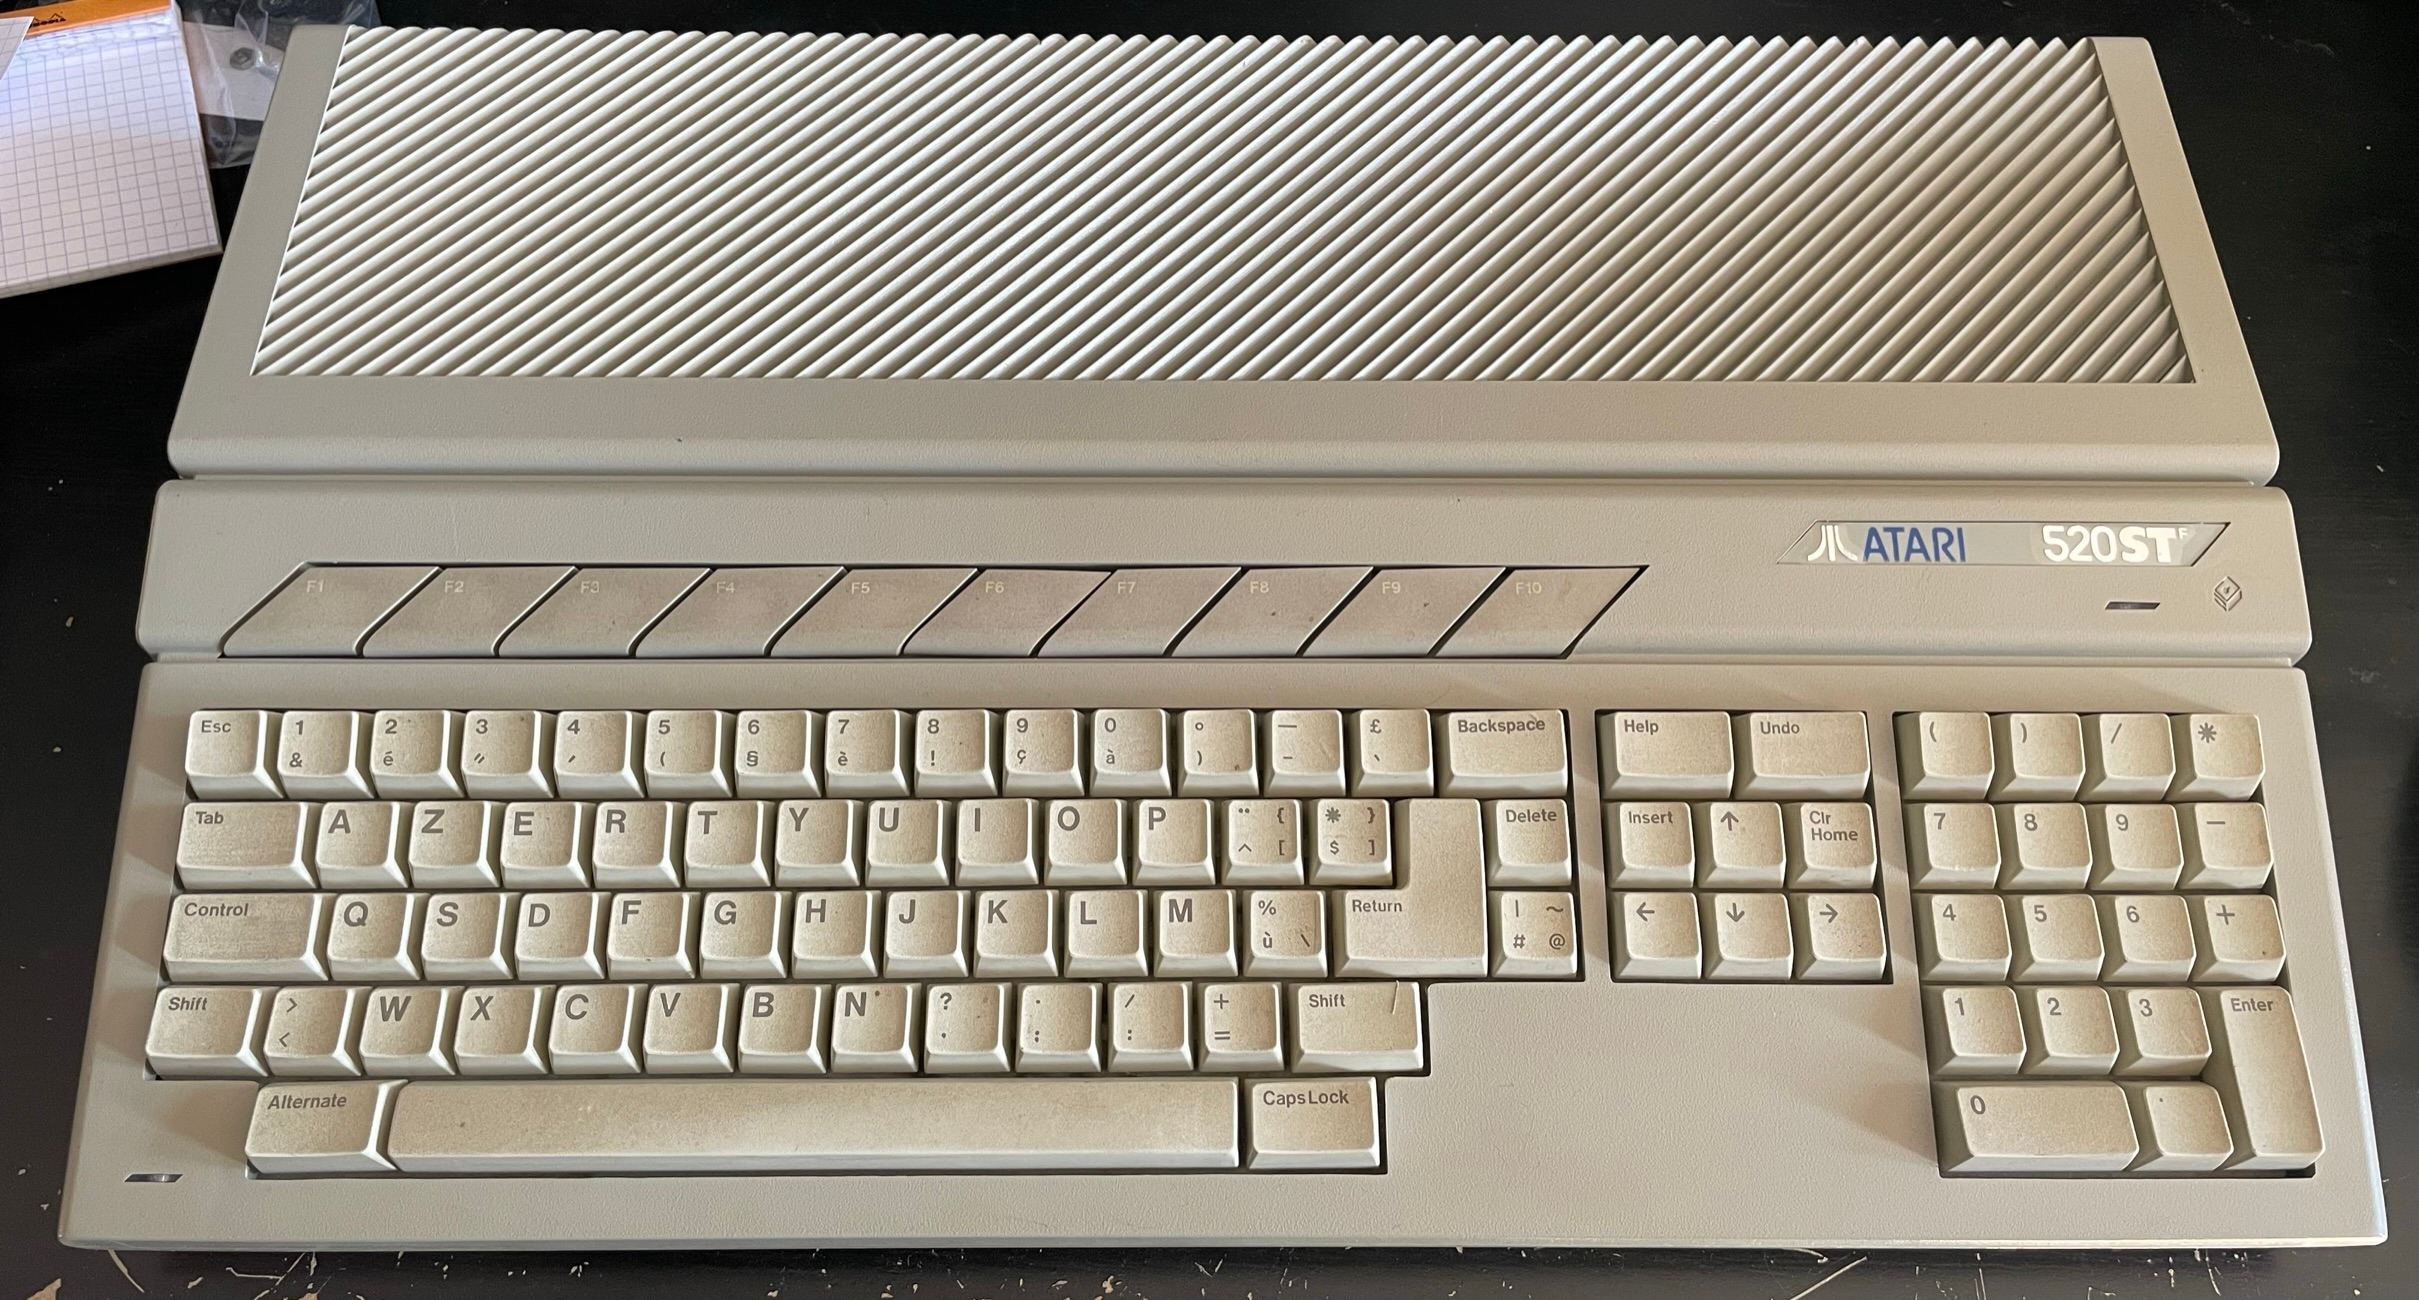
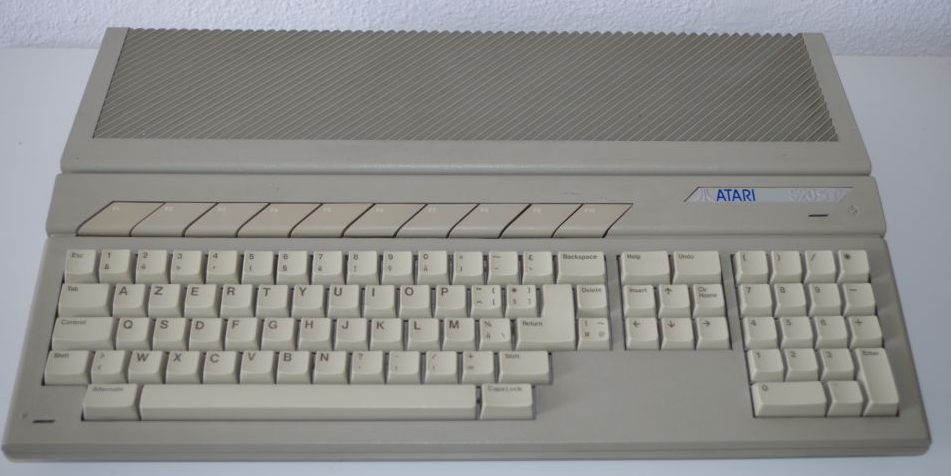
Atari 520 STF, 1040 STF
The most successful model, released right after the ST.
It’s basically a ST with internal PSU and floppy drive. All the following models will be the same.
RAM: 512kB (520 STF) or 1MB (1040 STF)
RAM expansion: not natively, max 4MB (soldering required)
TOS version: 1.02 (often), 1.04 (from ~1988)
TOS upgrade: Yes, up to 1.04 natively
Other possible native upgrades: Blitter (motherboards from ~1987 onward)
Atari 520 STFM, 1040 STFM
Those are STF models with a RF modulator added (hence the ‘M’ for Modulator). You get an additional RF cinch video output on the back near the video connector + composite on the main video connector. More on that below.
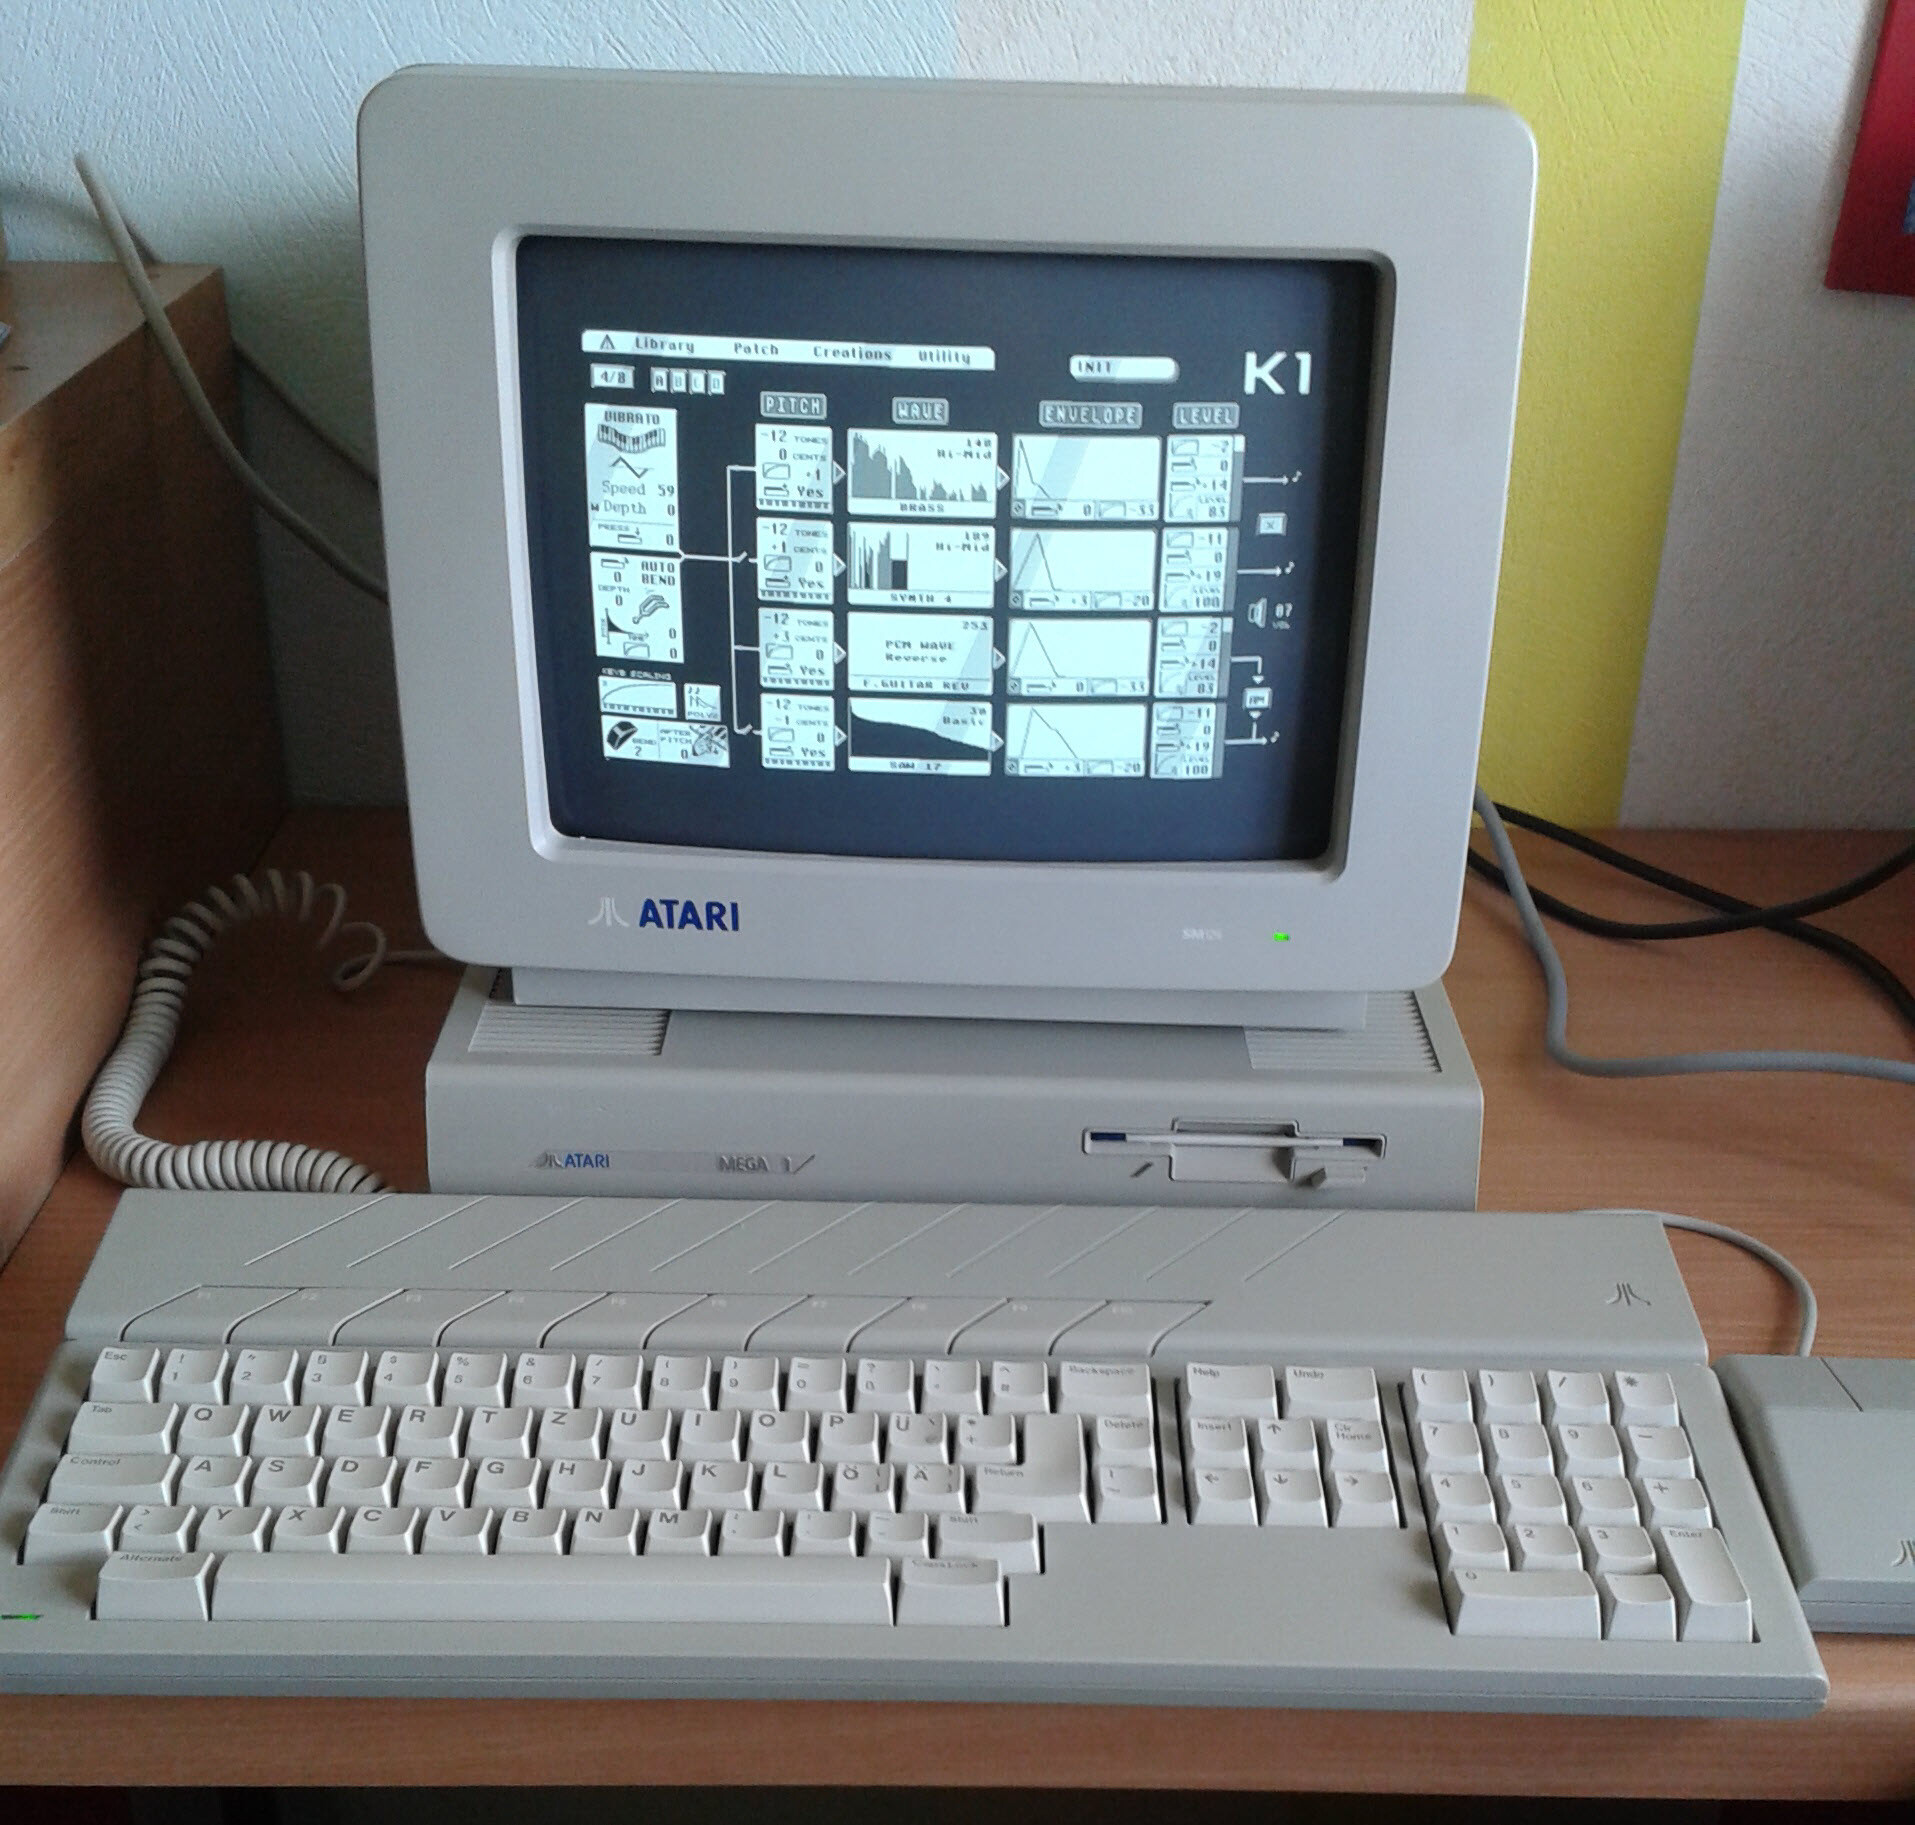
Atari Mega ST1, Mega ST2, Mega ST4
Released in 1987.
« Professional » model, with a « desktop »-style case, a separated keyboard, a video builtin acceleration (blitter), more memory and an expansion bus used for third party cards (like VGA cards). It’s also the first ST to exist in 2MB (Mega ST 2) and 4MB (Mega ST 4) native RAM configuration.
RAM: 1MB (ST1), 2MB (ST2), 4MB (ST4)
RAM expansion: not natively, max 4MB
TOS version: 1.02, later 1.04
TOS upgrade: Yes, up to 1.04 natively
Other possible native upgrades: VGA, network card
Atari 520 STE, 1040 STE
Released in 1989, replaced the STF line.
Enhanced version of the Atari STF with a new video chip allowing smooth hardware scrolling, more colors and 8-bits PCM stereo sound (up to 50kHz). It also has the blitter acceleration chip introduced with the Mega ST and new joystick ports compatible with the Atari Jaguar game console pads (usually not supported by games).
It has the same overall case than the STF. You can check it’s an STE easily other than with the label: there’s two new joystick ports on the left side and a stereo cinch output on the back.
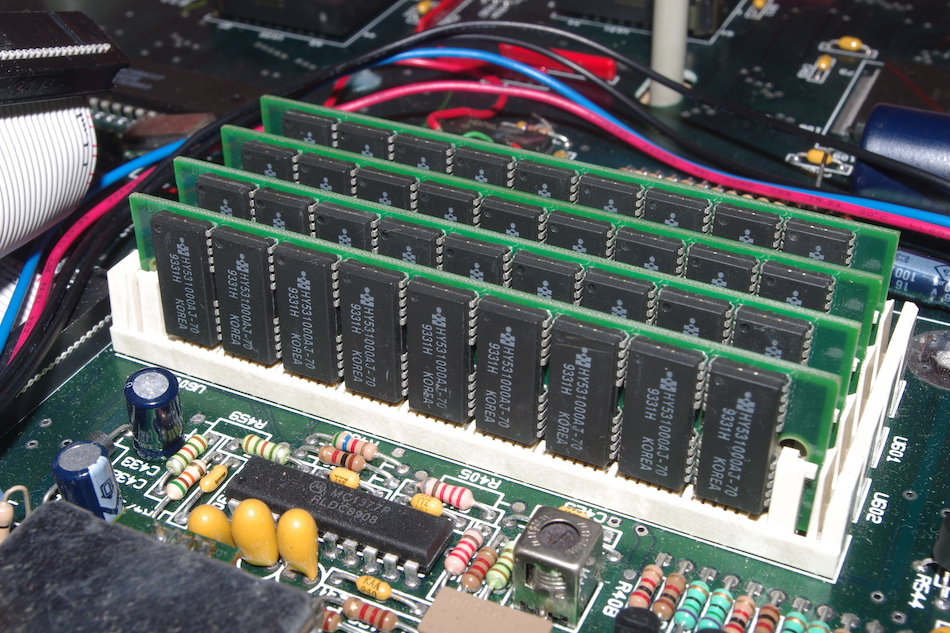
RAM: Was sold with 512kB (520 STE) and 1MB (1040 STE) however it’s the same model, only the number of RAM modules installed is different.
RAM expansion: Yes, up to 4MB. There are 4 slots for SIMM modules, so it’s easy to change. Official supported configurations are 512kB (2x256kB), 1MB (4x256kB), 2MB (2x1MB), 4MB (4x1MB).
TOS version: 1.06, later 1.62 (bugfix)
TOS upgrade: Yes, up to 2.06 natively
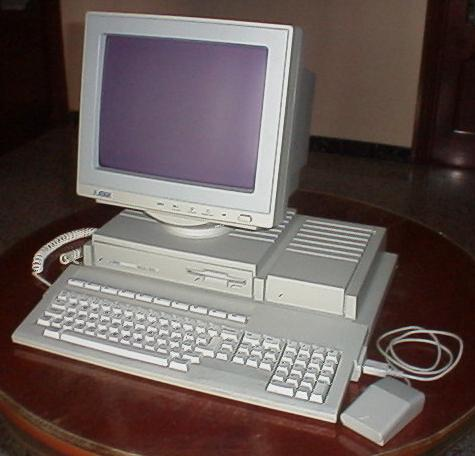
Atari Mega STE
Professional version of the Atari STE. Like the Mega ST, it comes with more features: a VME internal slot for third party cards (network, VGA), and often with an optional internal hard drive.
It can also run at 16Mhz instead of 8Mhz, making compatible software and some 3D games easier to play.
RAM: Same as the STE, it’s modulable
RAM expansion: Yes, SIMM modules, up to 4MB.
TOS version: 2.05 or 2.06 (bugfix)
TOS upgrade: Yes, up to 2.06 natively
Other possible native upgrades: VME internal card (VGA, network, RAM expansion), SCSI internal hard drive, 68881/2 FPU, 1.44MB floppy disk drive
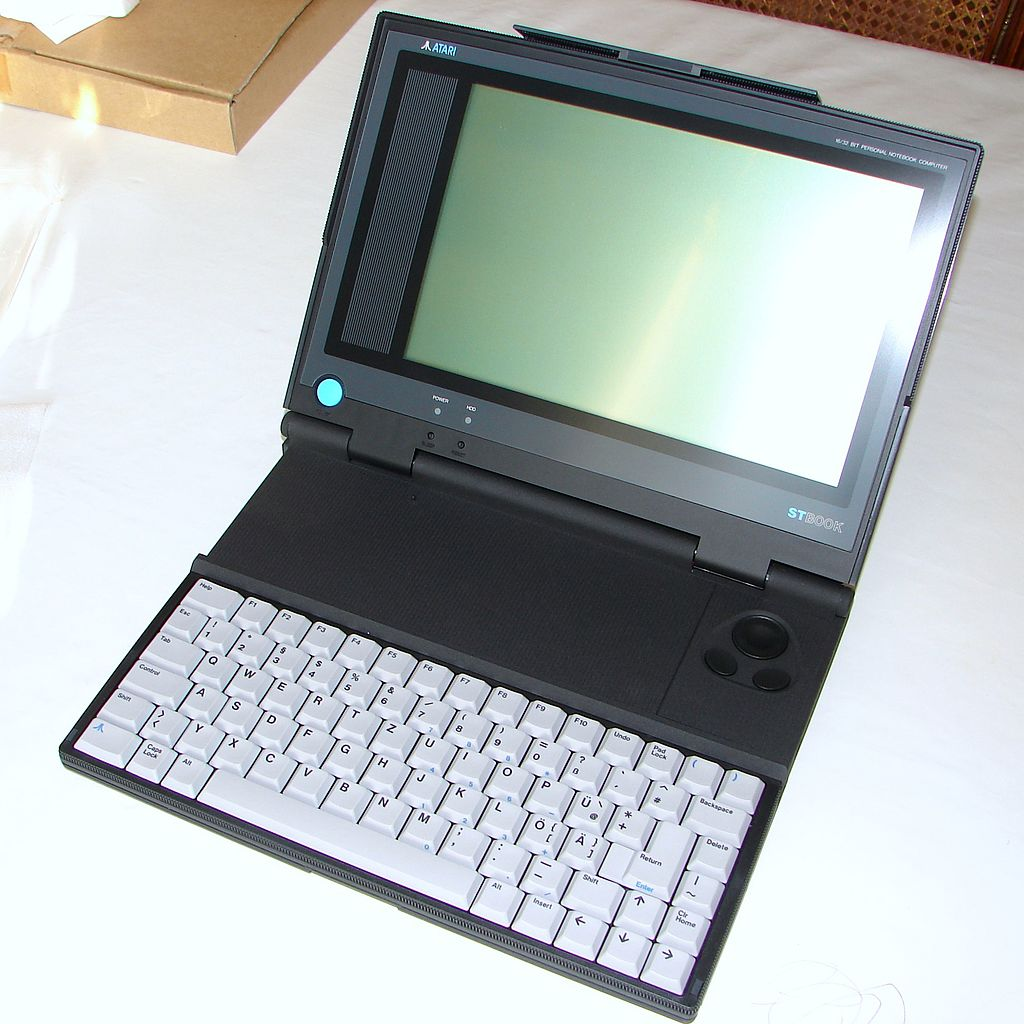
Atari STacy and ST Book (laptops)
Rare computers, the STacy is basically a modified Mega ST with TOS 1.04, while the ST book is a modified STE with TOS 2.06.
They both work in monochrome mode only.
_(T_Cont%C3%A9).jpg)
Atari TT030
High-end version of the ST line, it’s a full 32-bits computer that has very (VERY) different features so I won’t cover it here.
It has the same case than the Mega STE (because the Mega STE borrowed it), only it’s white instead of grey.
Atari Falcon 030
Sold between 1992 and 1993, the Falcon 030 was a 32-bits computer that aimed to replace the ST line but commercially failed for many reasons, again it’s a very different computer and I won’t cover it here. It’s not 100% retro-compatible with the ST line.
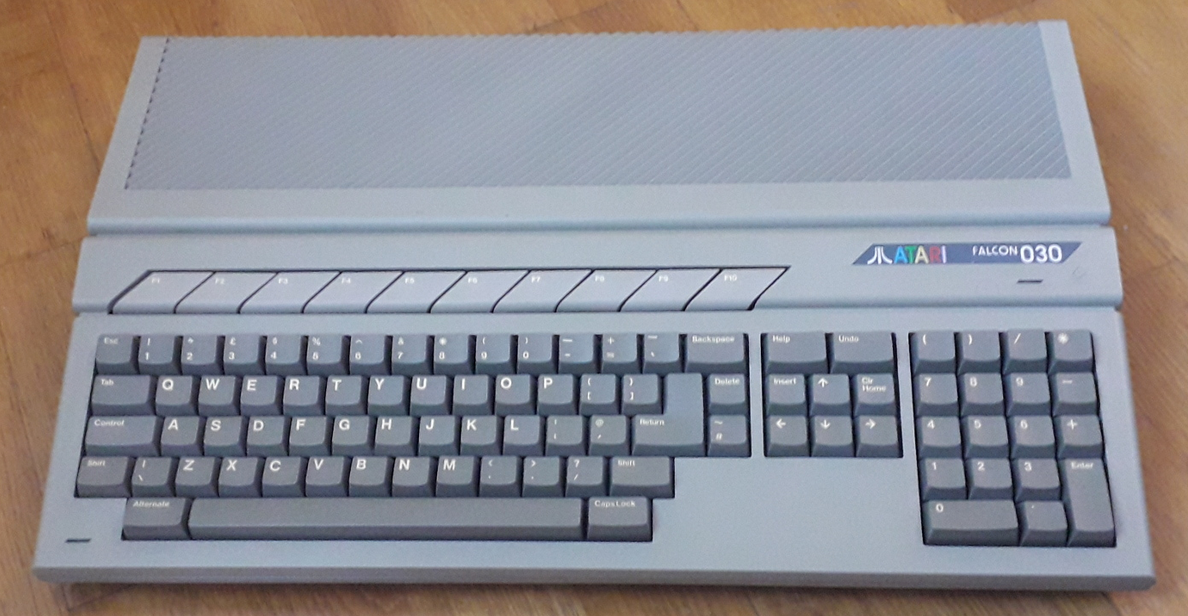
Just know that it uses the same case than the ST/STE line, only the keyboard color is usually dark grey and the back connectors look really different.
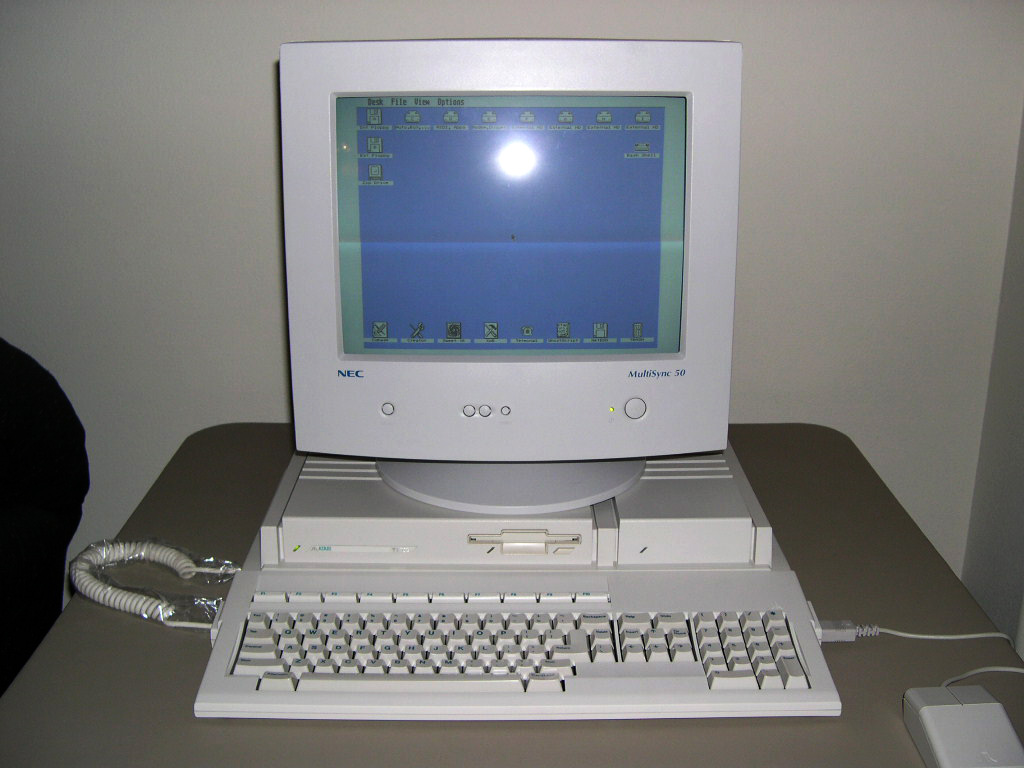
How do you make it run / use a ST?
Once plugged on a compatible monitor or TV set, you turn it on.
Here are the main possibilities of what you can get:
- No floppy disk inserted. The desktop will show after a wait for a floppy (up to 30s).
- Non-bootable floppy inserted. The desktop will show immediately. You can create a non-bootable floppy from the desktop (« Format disk »).
- Bootable floppy inserted. The ST will immediately gives control of the whole system to the software located on the floppy disk. This is the case of most of the games and demos which are recorded on floppy disks that can’t be read as files by the OS.
- Non-bootable floppy disk inserted, but hard drive installed with bootable drivers. The ST will run boot files on the hard drive and then show the desktop.
How to check it’s working
Turn the ST on without any floppy. You should see a white screen and hear « clicks » from the audio output when pushing random keys on the keyboard.
Important notes if you have TOS 2.xx installed :
TOS 2.06 (Mega STE and some upgraded STEs, a very few STs) : you should see an Atari logo and a memory check at boot time.
TOS 2.xx : if there is no floppy disk drive detected, the boot will crash immediately, displaying 4 bombs.
If you don’t hear anything, either you don’t have audio output on your cable, or something is very wrong since the keyboard’s click sound is generated by the TOS just after initializing.
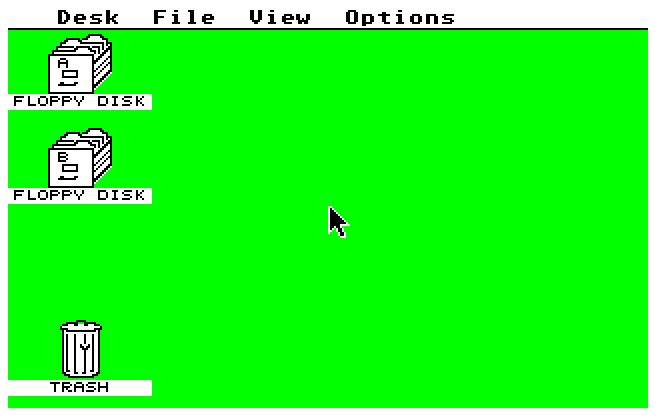
Wait 10~60s. The GEM desktop must appear.
If you get two icons labeled « FLOPPY DISK », « A » and « B » then it detected your floppy drive (it doesn’t mean the floppy drive is working correctly, just that it detected it). If it doesn’t show, your floppy drive, or the floppy cable, or the PSU, is faulty.
If you have a non-bootable floppy disk, you can insert it and try to double click on the icon the see the disk contents (files and folders).
If you have a bootable floppy (game etc), insert it and press the « reset » button on the back of the computer (left side on Mega STE) to force it to boot from the floppy. It should boot on the floppy disk software, else again something is wrong on the floppy drive side.
Useful tips
Moving the cursor with no mouse
On the desktop, if your mouse doesn’t work or you don’t have one, you can use the following key combinations :
- Alt-arrows to move the cursor around
- Alt-Shift-arrows to move the cursor around (slowly)
- Alt-Insert for left click
- Alt-Delete for right click
Those shortcuts don’t work in games or demos since the TOS is usually disabled in this case.
General GEM/desktop tips
On the desktop, the windows’ closing button also acts as « back one folder » when you’re in a folder.
Pressing the ESC key on the desktop will refresh the current active window, for example, if you changed the floppy disk.
The meaning of the two FLOPPY DISK icons A and B is different based on the number of floppy drives you actually have. If you have two floppy drives, then it represents those two drives. If you only have one drive, then it represents two virtual floppy disks. Copying a file from A to B will result in the GEM asking you to swap from floppy A to floppy B during the copy.
You cannot rename a folder prior to TOS 1.04.
You can format a floppy from the desktop but you can’t format/initialize a HDD without third party tools (see the HDD section).
Warm and Cold Reset
Starting from TOS 1.04, the shortcut Ctrl-Alt-Del do a warm reset of the computer (like the reset button located on the back of the computer) and Ctrl-Alt-Shift-Del do a cold reset (memory check and full OS reset).
Note that unlike modern computers, a simple reset triggered through the reset button or Ctrl-Alt-Del key shortcut does NOT erase the memory contents. Some programs and even memory setup can remain active. Demos used this to include bonus « reset demos » but it was also used by viruses. Sometimes HDD adapted games will also change the memory configuration, and you may get « not enough memory » trying to run other programs even after a reset. In this case a full power cycle or Ctrl-Alt-Shift-Del may be required.
What needs to be checked/maintained in priority
The Atari ST computers could be misleading because they’re quite simple and rarely fail. So they often look like they’re working well, when actually things already started to go wrong inside.
The two mandatory maintenance are:
- Recapping the PSU. Even if the capacitors look fine, they’re 30+ years old and need to be changed. A bad PSU makes the ST randomly fails, you may get video interference. The first thing to fail is the floppy drive, because it drains a lot of current when working. Worst case, the PSU fails and burn things on the mainboard. Really, recap the PSU as soon as possible.
- Cleaning the floppy drive’s heads with IPA. When doing so, absolutely DO NOT unmount the heads. Just lift them gently. Also, you can lubricate the moving parts.
There’s no need to immediately recap the mainboard if not needed. I would recommend to change the only big capacitor, but that’s all.
There is many models of PSUs used through the whole ST line, so there’s no single ‘recap kit’ available, you need to check your PSU model and find a recap kit for it, or buy the parts yourself.
My mouse or joystick doesn’t work correctly
First thing to check is to try another mouse or joystick. Mouses can unfortunately break and go one side only if an internal light captor is broken. Sometimes it’s also just the cable that don’t work anymore correctly (try to wiggle it a bit).
If your mouse works correctly when powering up the ST without any floppy but suddenly starts to make reverse vertical motions when floppies are inserted (up and down directions are swapped), your floppy disks are infected by the GHOST boot sector virus. I made a tool that detects and kills this virus specifically: Ghost Killer.
However, the ST line is known for the very bad location of the mouse and joystick ports, usually below the keyboard, resulting in the ports’ solder joints breaking down with time.
It can be fixed but you need to VERY CAREFULLY open the keyboard since a lot of parts will fall when doing this. This is an annoying fix to do.
Can I buy a ST from Europe and retrofit it as a US ST?
Short answer: Yes.
The only difference between Europe and US STs are:
- The power supply (internal, except for early models)
- The TOS version (60Hz US vs 50Hz UK/French/German…)
- The keyboard layout
- The composite modulator (for STs that have one)
All models of Atari ST can work in 50Hz and 60Hz modes in color.
A US TOS will boot at 60Hz while a European TOS will boot at 50Hz.
But even if the US, if you boot on a European version of game or even more, a demo, chances are it will change the video back to 50Hz! (demos are usually made for 50Hz only)
US versions of games on the opposite were tested for 60Hz and often run a bit faster.
So if you change the TOS chips of an European ST for a US TOS, you will get a « US ST ». Not that the keyboard layout may change as well (I think only UK has a QWERTY layout similar to the US).
The PSU can be changed for a 120V one (from another ST) or for a modern one like the MeanWell RD-35A (for all the STF/STE/Mega ST line). You will need to adapt the power switch however. You can also use an external step up converter.
Note: The Mega STE has a different PSU than the rest of the STs. It’s actually the same than the Falcon PSU. The main difference is it generates -5V in addition to the other lines.
As for the video output, be aware that if there’s a composite/RF modulator, if you change the TOS for a US one, you won’t magically get NTSC composite since it only outputs PAL. Best case, you’ll get 60Hz composite PAL. The best is to get a RGB cable and compatible monitor anyway (in this case it’s the same video signals, only the vertical refresh frequency that changes).
The monochrome mode (71Hz) is the same in all countries.
Can I swap floppy drives A and B?
No, not without hacking into some internal circuitry.
I have 4MB of RAM and some games and demos on floppy don’t work.
While most software run without a hitch with 4MB of RAM, this setup has specific issues with a few badly programmed games and demos that were released when having 4MB of RAM was unheard of (or very rare).
This is one case of non-compatibility with bootable software on floppy disk, the other one being the TOS version.
What is the best ST model to get?
Depends what you’re looking for and if you will to make upgrades or not.
Since the ST line was done both for games and professional use, this may be a tough question to answer, but here’s mine:
You want to play from floppy disks or a floppy emulator (Gotek, HxC)
Best model: Atari 1040 STF with TOS 1.02
Other best models: Any ST/STF/Mega ST/STE with TOS 1.xx
TOS 1.00 and TOS 1.02 are the most compatible version for software on floppy.
There is a very tiny amount of games that were incompatible with TOS 1.02 when it came out but it got fixed afterwards.
1MB of RAM: While the vast majority of games were tailored for 512kB of RAM, having 1MB is better to run some games and many demos.
Note that it is strongly recommended to NOT use a hard drive with TOS 1.00 and TOS 1.02 because they have too many limitations and can even corrupt data on the hard drive.
You want to play Hard disk adapted games and some floppy ones
Best versatile HDD model (for earlier games/demos): Atari Mega ST2 with TOS 1.04
Best versatile HDD model (for newer games/demos): Atari STE with TOS 1.62 and 2MB of RAM
Other best versatile model: Atari 1040 STF with TOS 1.04
TOS 1.04 minimum: if you want to use a hard drive (or a hard drive emulator), you need to have at least TOS 1.04.
Previous versions (TOS 1.00, TOS 1.02) have bugs that can corrupt your hard drive contents (no less).
Unfortunately, it also introduced a few incompatibilities with earliest games on floppy, but hard drive adapted games are always patched to be able to work with more recent TOS versions.
2MB of RAM: Hard drive adapted games require 1MB, and many require 2MB. So it’s better to get 2MB from the start.
I didn’t put « 4MB » because for many reasons, having 4MB of RAM is incompatible with a few games and demos on floppy that just crash when they boot.
STE: On STE, some advanced effects in a few earlier demos won’t show correctly (fullscreen, hardscroll…).
However since the STE’s RAM can be very easily expanded to 2MB, it’s better than a 1040 STF.
Also a few games (really a *few*) will take advantage of the STE hardware.
You want the best model even if software on floppy sometimes fail
Best model: Atari Mega STE with TOS 2.06 and 4MB of RAM
Second best model: Atari STE upgraded with TOS 2.06 and 4MB of RAM
The Mega STE is the best computer in the pure « ST » line because of its capacity to switch to 16Mhz, which can be cool for 3D games and some 2D ones. But for that you need either the HDD adapted versions, or tools to boost the frequency while booting on floppy disk, since at boot time the Mega STE always revert to 8Mhz by default.
Also, you will be able to watch the most recent demos (released after 2000) that often require 4MB of RAM.
And finally, you get the TOS 2.06 new features, which are for the most part a better desktop. Or should I say, a decent desktop 🙂
Compatibility issues:
The TOS 2.06 + 4MB RAM combination means some games and demos on floppy will fail to boot. Most of them will work, but you’ll hit compatibility issues from time to time.
A few early demos from the 1980~90 won’t show correctly on STE / Mega STE.
And finally, even a couple recent demos don’t work correctly on Mega STE, especially those doing advanced color effects, because of a slight hardware timing difference, even at 8Mhz.
How do I plug my ST on a modern monitor / TV?
Aaaaand that’s where complex things happen.
All Atari ST have the same video output, which is a quite sub-standard DIN13 with a lot of signals that go through it.
In order to quickly understand what’s follow, you need to know that on this single connection, you can find:
- A 15kHZ RGBHV video output (TV compatible)
- A monochrome 31kHz video output (VGA compatible)
- A mono sound output
- A composite pin output that only acts as a composite sync EXCEPT in some models where it outputs actual composite video
- A monochrome/color detection pin
All those pins are needed because the ST can work in two completely different modes: monochrome and color.
Both of those modes are INCOMPATIBLE with each other. The video modes are different and so are the monitors needed to display them.
The ST selects the mode based on the « monochrome detection pin », which is set up by… the video cable! So based on the cable you plug on the ST, it will boot either in monochrome or in color mode. A ST without any video cable plugged into the DIN video port will boot in color mode.
If you change the cable type while the ST is on, it will immediately resets.
Monochrome (High resolution) mode
This mode is a 31kHz video mode, which means it’s compatible with most VGA monitors out there (even modern ones).
The vertical refresh rate is around 71Hz and the single resolution available is 640×400 in monochrome (black on white or white on black).
It has been included in the ST for professional use and to mimic the Macintosh, which had a similar resolution. In effect, a lot of important pro software were developed for the Atari ST and they needed this mode to work.
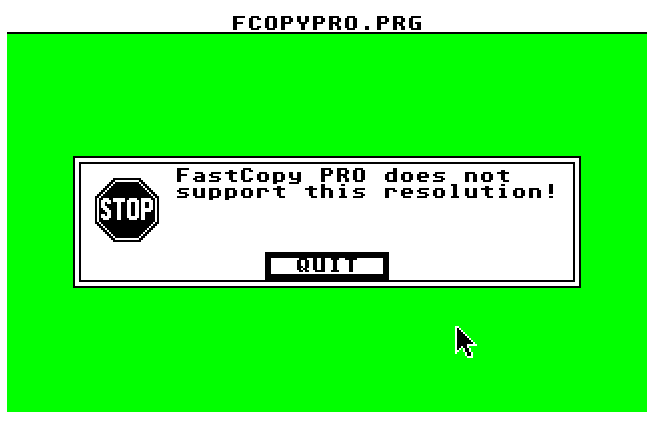
Almost all games and demos will NOT work in « High resolution » mode. On the desktop, « Low » and « Medium » resolution are disabled (they’re color modes):

As far as retro monitors are concerned, the ST had a specific CRT monitor for the monochrome mode (the Atari SM124).
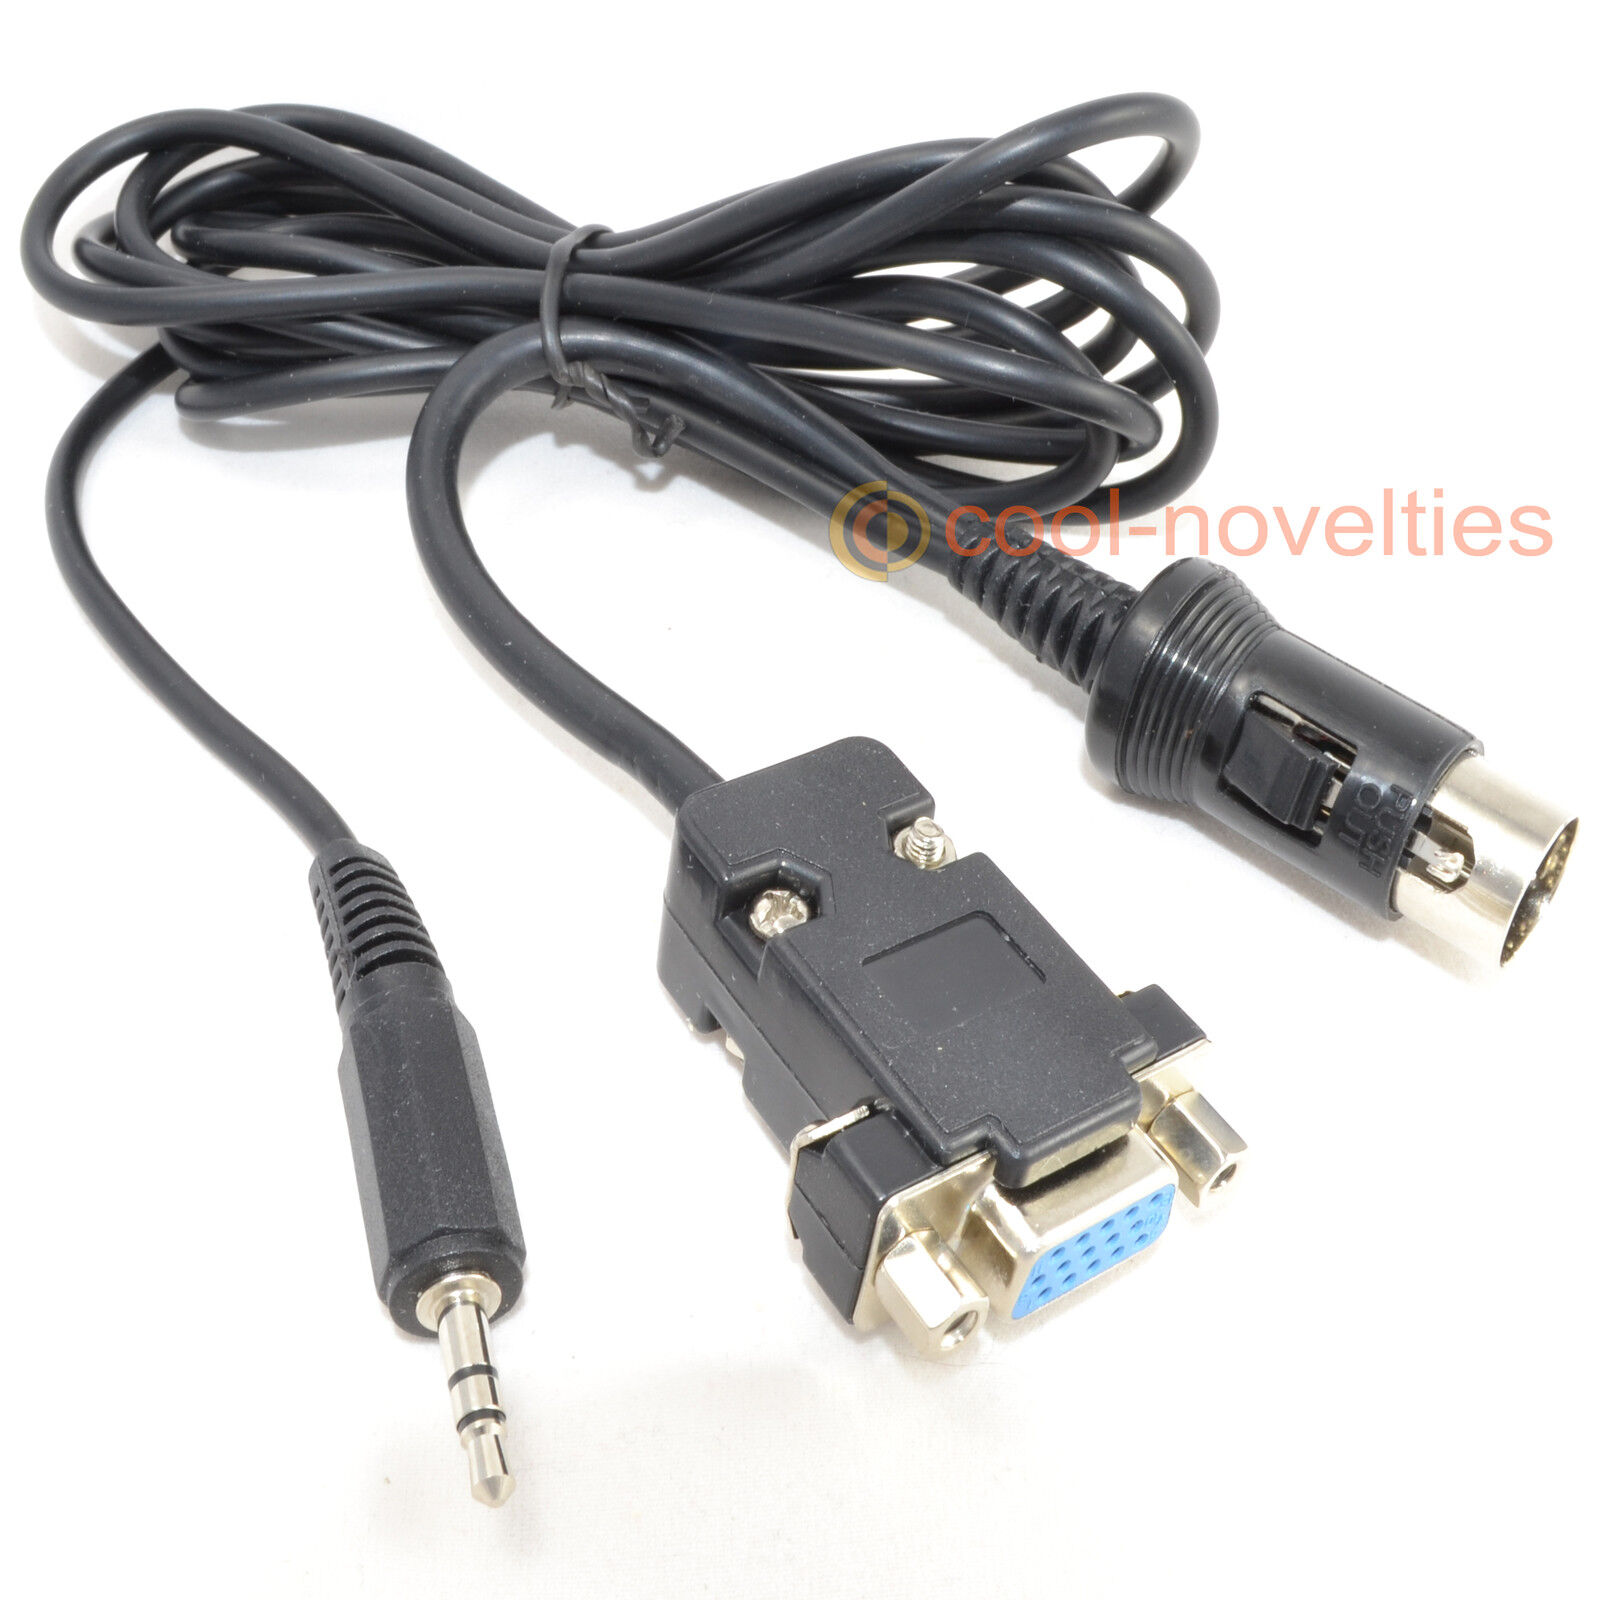
For modern monitors, as I said before, the 31kHz signal is compatible with most modern VGA monitors so all you need is an Atari ST « monochrome » VGA cable that will route the monochrome signal to the R/V/B input of VGA, and do the same with the H+V sync signals. that’s as simple as that.
Color mode
The color mode is a 15kHz mode with a vertical refresh rate of 50Hz or 60Hz.
The boot frequency depends on the TOS you have in the ST (it will boot at 60Hz with a US TOS for instance), but all STs can do both and it can be changed on the fly. I know even one instance of a game that allows to choose between 50 and 60Hz in the options (Wings of Death).
The color mode has two resolutions:
- Low Resolution: 320×200, 16 colors
- Middle Resolution: 640×200, 4 colors
In practice, all games work in low resolution to get the maximum colors available. Middle resolution is preferred by tools when you’re on the desktop, and often complain and won’t start if you’re in low resolution.
You can switch from low to middle resolution on the desktop. High resolution is disabled in color mode.
Back then the Atari ST could be plugged to many various monitors and TV sets, thanks to many cables and ST variations available. You can still plug it to an Atari or Commodore 15kHz CRT monitor (or Sony PVM if you want), but to plug it to a modern monitor is a bit more work.
The case of RGB
All STs should output RGB+HV signals, because that’s what the Atari monitors required. But in practice, that’s not always the case when you have a RF+composite output (see below).
Some STs also output a composite sync (that’s the HV only) on their composite output. But others output a full composite signal instead.
There’s two main possibilties when you want to deal with 15kHz video signals nowadays:
Get a 15kHz compatible monitor
Basically, it’ stupid, but if you have an old TV set with a SCART input, plugging an ST on it should work in most cases. The quality won’t be the best, but really, it works! Of course, SCART disappeared years ago, so you can’t do that with the more recent models.
So, getting a 15kHz monitor instead. This is kind of tricky. Some VGA monitors (often old) could take a 15kHz RGBHV signal from the VGA socket.
If you have one, then you only need to get an « Atari ST color VGA cable » and you’re done. Don’t confuse it with the Atari ST monochrome VGA cable I posted above, because it’s not the same wiring.
In any case, if everything goes well, you’ll get a color picture on your monitor. While this has been proved multiple times to work, the first difficult part is to get a 15kHz compatible VGA monitor, because that’s a non-documented feature. So it’s all about luck and opportunity.
Also, the drawback is that you won’t have a perfect video quality, despite not using any converter. That’s because the video signal generated by the ST is far from perfect and was tailored for CRTs, which have a better tolerance and kind of hide the signal’s defects, while a flat panel monitor has to convert the analog to digital, and will show all those defects in the final result.
For example, a lot of people see « jailbars », repeated vertical bars in the background that exist because of a slight weakness in the video signal, repeated each 4 pixels of a video line, but isn’t visible on a CRT. As for me, I also found out that the pixels’ size was not consistent because of a weak crop & resize process in the LCD screen. So it works, but it’s far from perfect. This is the kind of issues scalers (listed below) take into account and the most expensive ones even have advanced features to filter and scan the video signal perfectly.
Get a converter or scan doubler
This is something that is discussed a lot online, but really, it’s one of the best solution. The only drawback: it’s usually not cheap.
The easier way to get the RGB output from an Atari ST is to get a RGB SCART cable. You will get RGBS and audio. There are also cables that output RGBHV on a VGA plug (this is the infamous ST color VGA cable I just talked about), or on a DB9 plug, which was the format used by both Atari and Commodore monitors of the time.
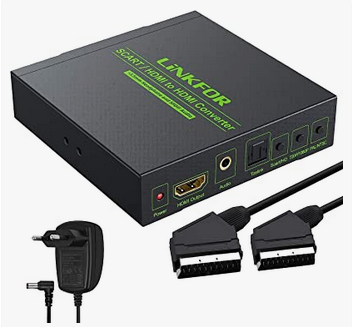
Cheap SCART to HDMI converters
You can get cheap converters on Amazon that will take RGB or composite through SCART and output HDMI at 50Hz or 60Hz. They work. The quality is average and you may have « ghost » pictures when there’s motion, but they work. So that’s a solution. It’s actually the same kind of converter used in flat panels TVs that have SCART input.
Price: around 30€
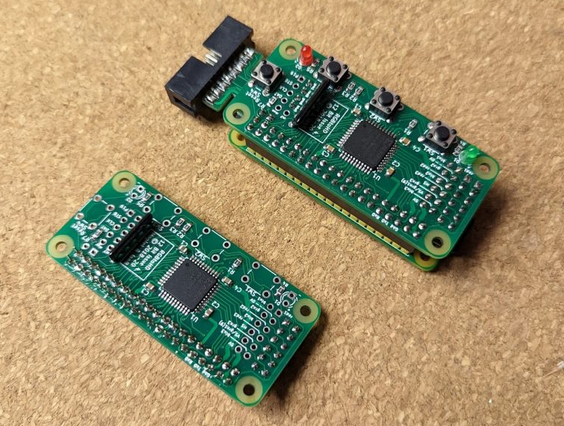
RGB2HDMI
The RGB2HDMI is a Pi-based solution that requires soldering into the computer, but has proven to output a perfect quality, and it’s quite inexpensive.
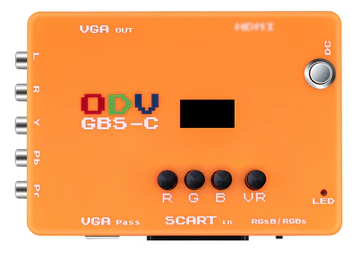
GBS-C
The ODV GBS-C or GBS-C or GBS Control is based on the GBS board and gives very good result and might be the best quality/pric ratio. You can hack a GBS board yourself if you’re into that kind of stuff (see GBS control). You can find them already built easily on Amazon. SEE WARNING
Price: around 90€
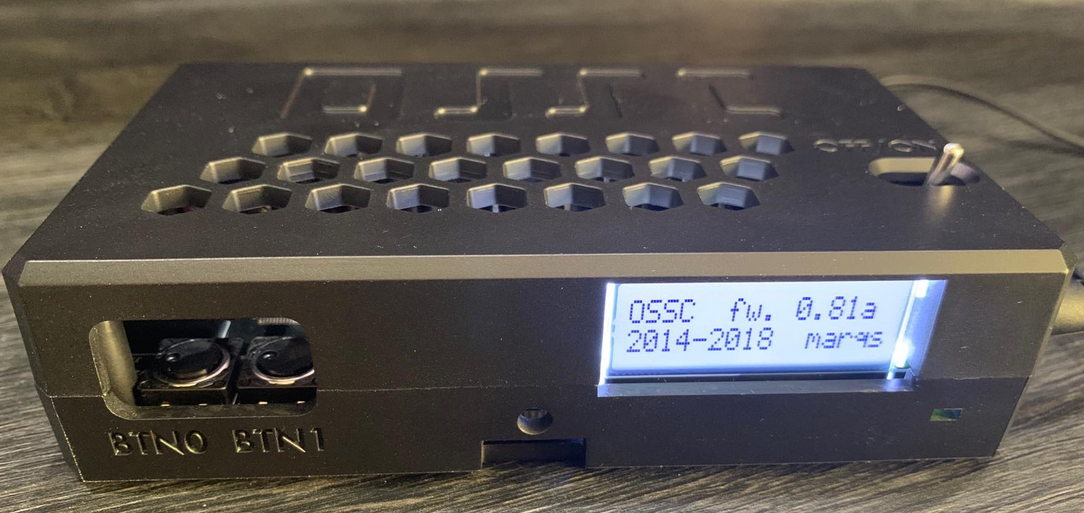
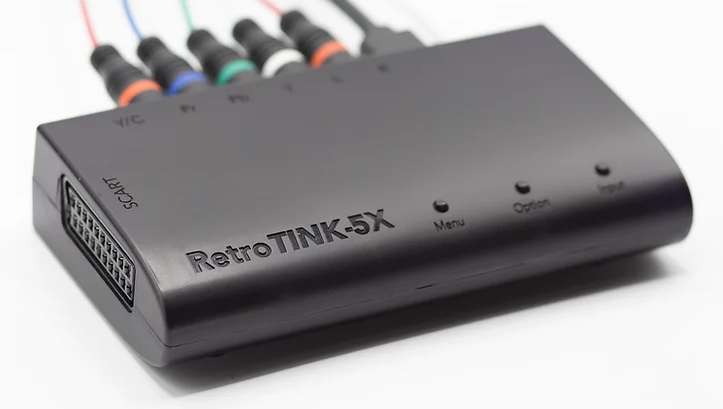
OSSC
The OSSC is a very well-known scan converter and works perfectly with the RGB of the Atari ST. It has the drawback of losing the signal for a few seconds when the resolution changes, which does not happen a lot on ST (but does on Amiga). It’s open source so a lot of clones are available. SEE WARNING
Price: around 140€
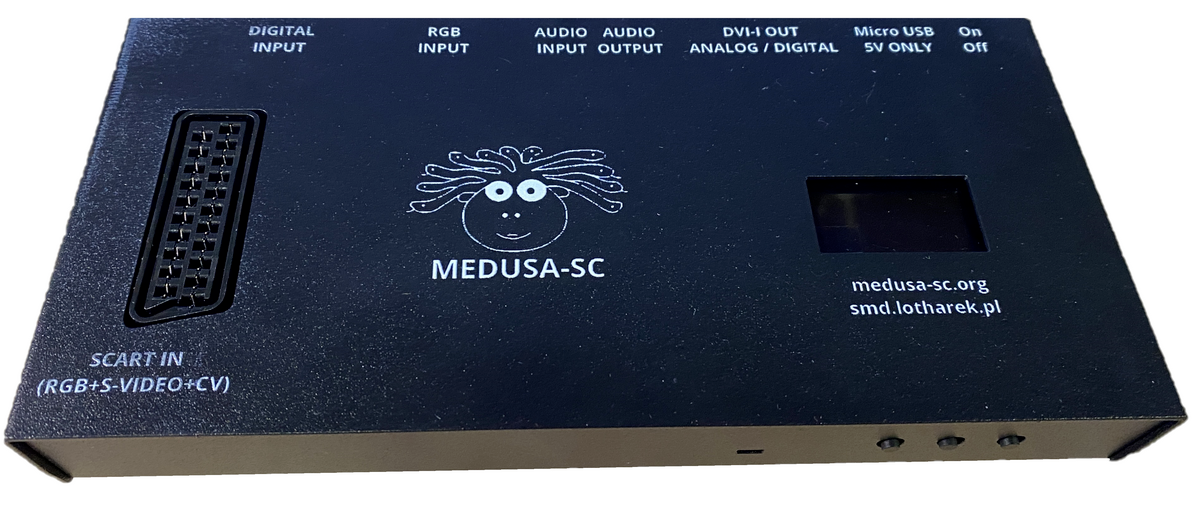
Medusa-sc
Medusa-sc is also a recent scan converter with various options a lot of different inputs. It gives a very good quality and should be a good choice if you have more than one retro computer/console. SEE WARNING
Price: around 230€
OSSC Pro
The OSSC Pro is the new high-end version of the OSSC that resolve most of the issues the OSSC had (especially the « lost sync » that happened when the computer/console changes its video mode) and adds many new features, on par with the RetroTink 5X Pro. Its only drawback is it doesn’t have composite input like the Retrotink ones. But on the other side, it’s open source (again).
Price: around 350€

RetroTink 5x Pro
The RetroTINK 5x-Pro is an expensive beast that takes any kind of signal (RGB/composite etc) and will work for the Atari ST as well. Again if you have more retro computers/consoles, you should consider it.
Price: around 400€
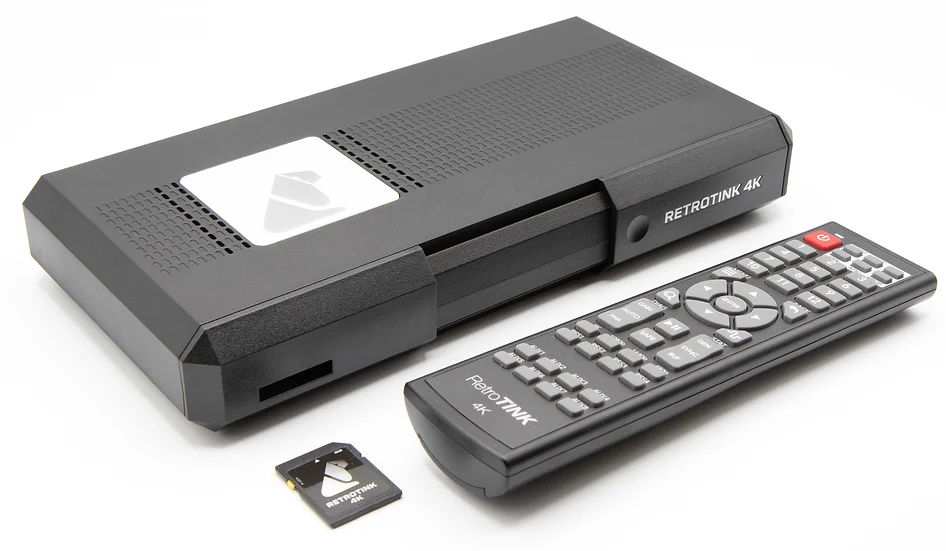
RetroTink 4K Pro
The RetroTink 4K Pro is a next generation scaler that will blow your mind with its CRT simulation filters and advanced features if you have a 4K HDR screen (if you don’t, the 5X Pro or OSCC Pro are enough). Basically, you will have the same experience than on a CRT with a 1440p or 2160p HDR screen. It’s very expensive but it’s going to be a reference for the next decade. It works perfectly with the Atari ST of course.
Price: around 900€
SYNC GENLOCK WARNING
WARNING: Please be aware that the GBS-C, OSSC and Medusa work in GENLOCK mode only, meaning they do NOT convert the vertical refresh frequency. It means you need to use a monitor that supports 50Hz! Most TV sets in Europe do, but I’m not so sure about the US and Japan.
One of my recent findings is that there is a lot of Freesync PC monitors supporting vertical refresh rates as low as 48Hz, so you’ll get a perfect sync and fluid motion when using an GBS-C, OSSC, or high-end scalers in genlock mode. Again, check the screen specs, it’s all written down there.
The case of RF and composite
Some Atari STs come with a composite + RF modulator, which means that :
- You get a RF output (there’s an additional cinch output near the video connector)
- You get a full PAL or NTSC composite signal on the DIN13 video connector instead of composite sync
- In some cases, you may not have RGB available (on ST/STF) when there is a modulator
This was optional and not all STs have this modulator installed.
The original 520 ST already existed with a modulator, and the STF line had a specific model name for it: « STFM » (M = Modulator).
In some countries, the ST was never sold with a modulator. That’s the case of France for example, where all TV sets had to provide a SCART input with RGB from 1981 to 2015. So the French STs are RGB only.
On the opposite, some countries like the UK had a wide number of units sold with a composite+RF modulator.
If you got a ST with modulator (again, you can see it easily because of the RF output near the video connector), I guess the origin of the ST defines what kind of signal the modulator is capable of doing, meaning US STs will generate NTSC chroma and European ST will generate PAL chroma. Changing the 50/60Hz frequency then may result in 50Hz NTSC and 60Hz PAL through the composite output.
It seems that (some/many/all?) STs with modulators and STFMs don’t have RGB output, but since Atari also sold RGB monitors, it looks like they reverted that decision and that STEs with modulators also outputs RGB. Please note it’s possible to rewire the RGBHV output but in order to do that, you need to remove the RF+composite modulator.
Other than that, if you want to get a picture from the composite output of an ST that has a modulator, you need a DN13 to composite ST cable and a composite to HDMI converter. Again, it depends of the money you’re willing to spend, but given the quality of composite, maybe getting a cheap Amazon converter is the way to go.
How to get the best picture out of an ST ?
Use a RetroTink 4K with a 1440p HDR screen, enabling HDR at 100Hz and BFI (Black Frame Insertion) with a CRT filter. You’ll get the same experience than on a very good CRT.
Or… use a CRT.
(one is cheaper than the other)
What is TOS and what version do I have?
TOS is the OS (Operating System) of the Atari ST line of computers.
Like any operating system, it contains many « bricks »: what we could call a bootloader, low level functions (BIOS), libraries to handle disk file systems (GEMDOS), graphic interface libraries (AES), virtual devices (VDI), it can load drivers and extensions from the floppy disk and hard drives, it contains the user interface called GEM, and at the very end of the boot process it executes the main user interface called « the GEM desktop », which is just a regular GEM program.
Each of those bricks are located in a single package called « TOS », by default located in a set of ROM chips. So on a basic ST, when you boot to the desktop, you don’t need anything on floppy disk or hard drive, all the files that are part of the OS are pulled from the ROM package.
The big advantage is that loading the OS is blazing fast and takes a minimum RAM. But the drawback is that any OS upgrade is a lot more complex than replacing files on a disk.
Please note however that it’s possible to replace the whole TOS or only parts of it (replacing libraries with faster ones, adding vector fonts or device support, replacing the desktop for a better one) temporary at boot time. It was and still is a common thing to do. It eats RAM however and make the boot process longer, so it’s usually hard drive users that do that kind of thing. In most cases, the TOS ROM package is used as is.
Unlike a lot of computers of the era and pretty much like the Macintosh, TOS is a graphic interface oriented OS and does not have any command line. It does not have any programming language included as well (like BASIC in most 8-bits computers). So it pretty looks like what we’re used to nowadays.
To get more info about the differences between TOS versions, alternate TOS and get TOS ROM images, check this excellent page by Avtandil.
Unfortunately, you can’t check the TOS version number directly if you don’t have SYSINFO.PRG, which is a third party software. And if you don’t have this tool on floppy, you’re out of luck.
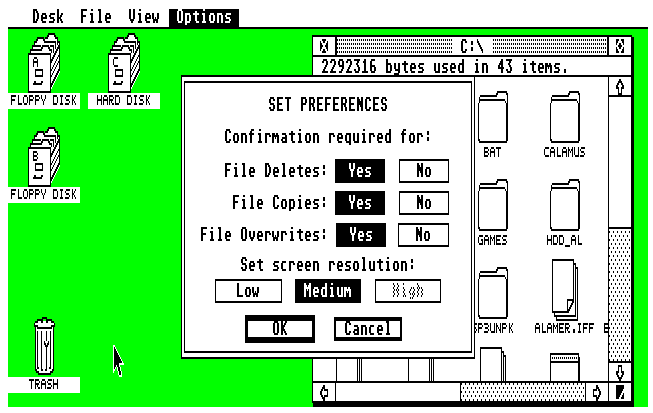
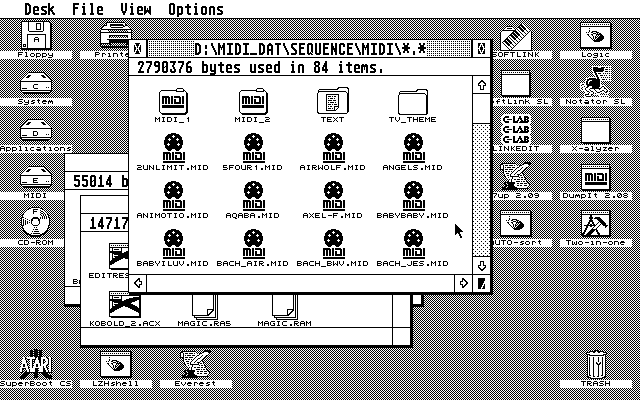
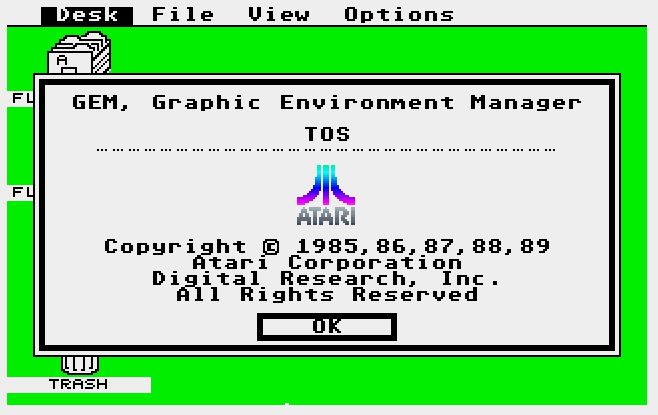
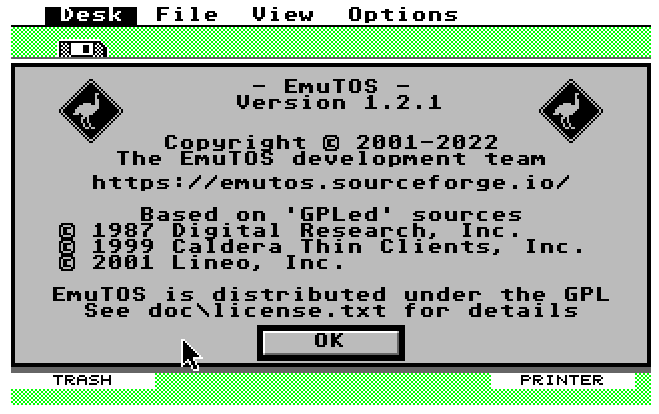
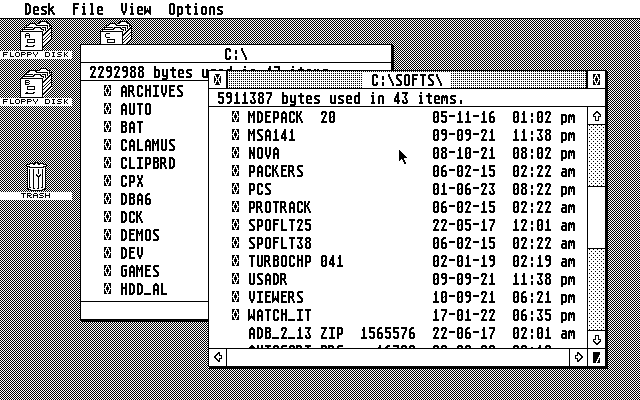
There are ways to check your TOS version however, and that’s by going to the desktop and go to Desk > Desktop Info… and check what you can see with the following screenshots:
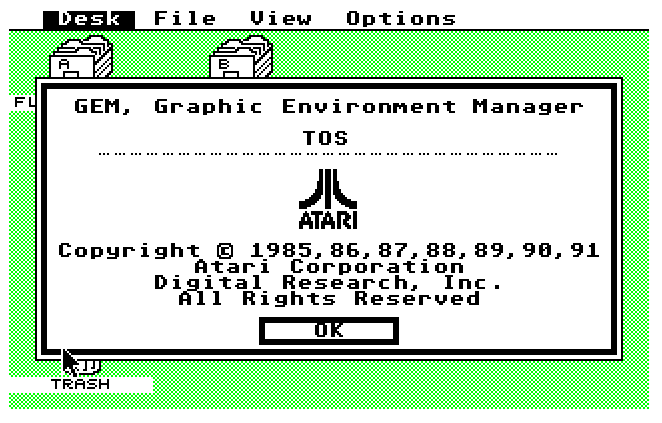
Atari TOS 1.00 …on floppy
For Atari ST only (earliest models)
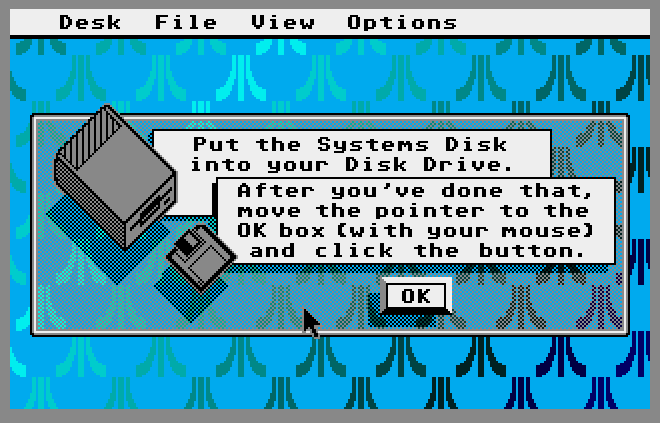
If you get this loading screen when you boot up your ST, you don’t have the full TOS in ROM.
Earliest models of ST didn’t came with TOS in ROM because it was not finalized when it went into production.
« Copyright (c) 1985 »
Plus the Atari logo is thinner, default desktop comes with a light background, and TOS is loaded from floppy.
So, basically, you have only a TOS loader in RAM, and when you load it from floppy, you have an early TOS 1.00.
Also, you have a rare ST.
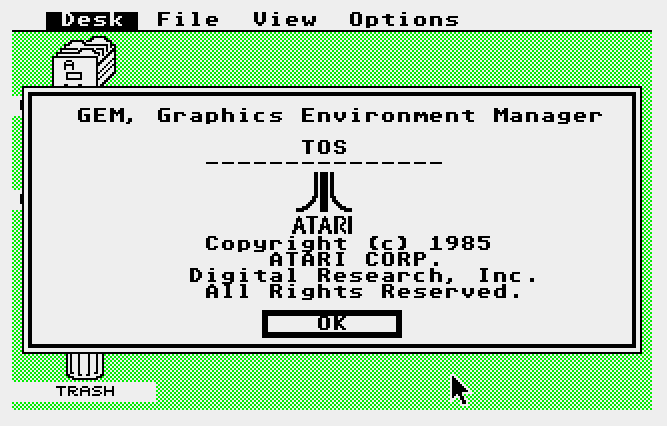
Atari TOS 1.00 (« ROM TOS »)
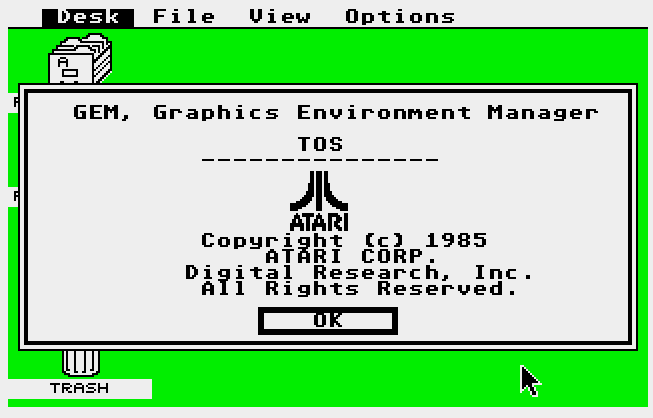
For Atari ST only (earliest model)
« Copyright (c) 1985 »
Also the « Options » menu doesn’t have a « Blitter » item.
Atari TOS 1.02 (« Mega TOS »)
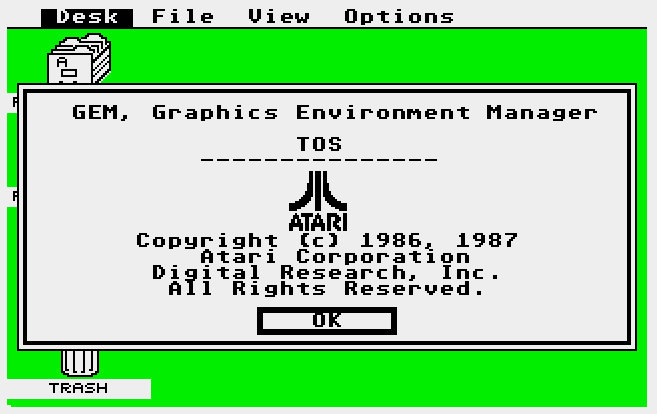
For Atari ST, STF, Mega ST only
« Copyright (c) 1986, 1987 »
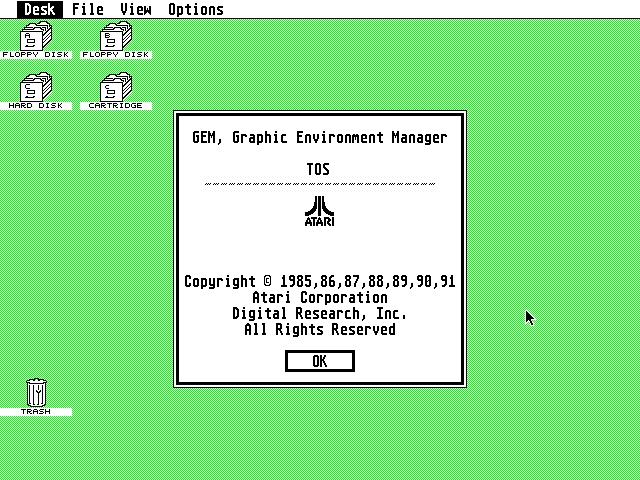
Atari TOS 1.04 (« Rainbow TOS »)
For Atari ST, STF, Mega ST only (not for STE)
« Copyright © 1985, 86, 87, 88, 89 »
Also, in color mode, a rainbow scrolls through the Atari logo
Atari TOS 1.06 and TOS 1.62 (« STE TOS »)
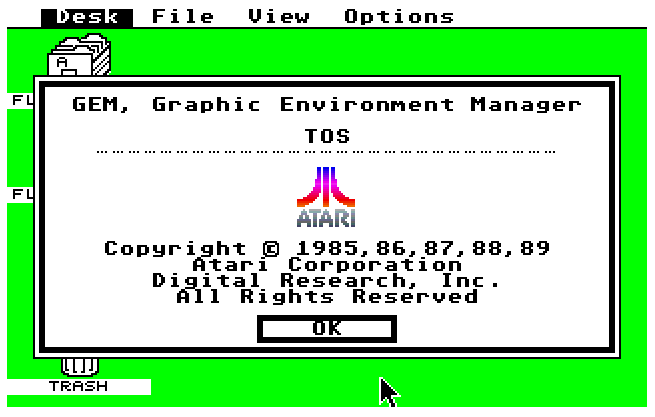
For Atari STE only (not for STF/Mega ST)
« Copyright © 1985, 86, 87, 88, 89 »
Also, in color mode, a rainbow scrolls through the Atari logo
This is TOS 1.04 adapted for the Atari STE.
There is no way to immediately know if you have TOS 1.62 since it only contains a very small bugfix.
You can check it if you have a floppy disk at hand and a color monitor :
If it the floppy isn’t TOS formatted, format it (select floppy disk A, go to File>Format, it will delete all the floppy’s content), change the desktop resolution (Options > Set Preferences > Set screen resolution : Medium, click OK) and save the preferences on disk (Options > Save desktop). Reset the STE (Ctrl-Alt-Del) with the floppy still inserted. If the desktop pops in low resolution, you have the bug that doesn’t load correctly the desktop preferences, hence you have TOS 1.06. If it boots to the medium resolution desktop, congratulations, you have TOS 1.62!
There is now way to distinguish TOS 1.06 from TOS 1.62 in monochrome (high resolution) mode.
Atari TOS 2.05 (« Mega STE TOS »)
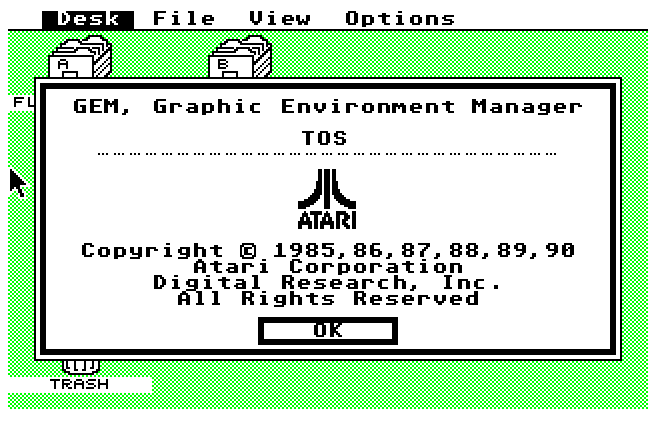
For Atari Mega STE only
« Copyright © 1985, 86, 87, 88, 89, 90 »
Also comes with a new desktop, for instance the Options menu has a « Read .INF file… » item.
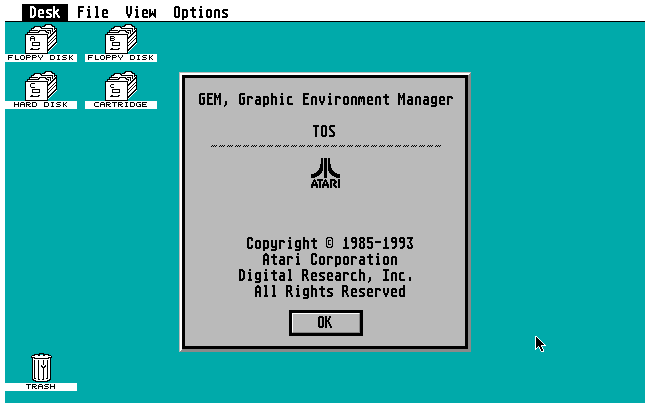
Atari TOS 2.06
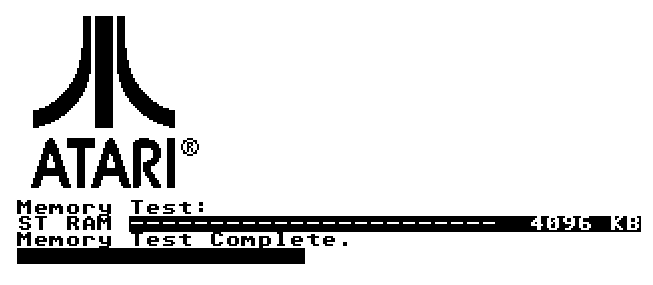
Atari STe and Mega STE only (natively)*
« Copyright © 1985, 86, 87, 88, 89, 90, 91 »
Same than TOS 2.05 with bugfixes. Also shows an Atari logo and memory test at boot time.
* This TOS is considered the best Atari TOS version available for ST and is actually compatible with the whole ST line. However, ST/STF/Mega ST cannot be upgraded natively, a third party hardware decoder must be installed to be able to put TOS 2.06 in those machines. So it’s rare but you can find TOS 2.06 in earlier STs.
Atari TOS 3.xx, TOS 4.xx
Those versions of TOS are for Atari TT030 and Atari Falcon 030 and cannot be used for any ST.
Also as you can see those TOS versions support a lot of new hardware features, like extended video resolutions and specific RAM expansions.
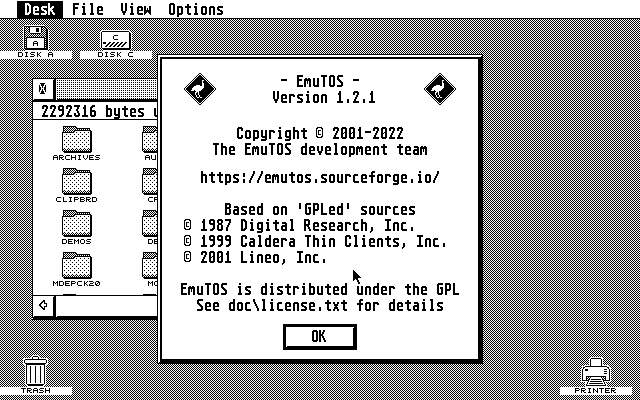
EmuTOS
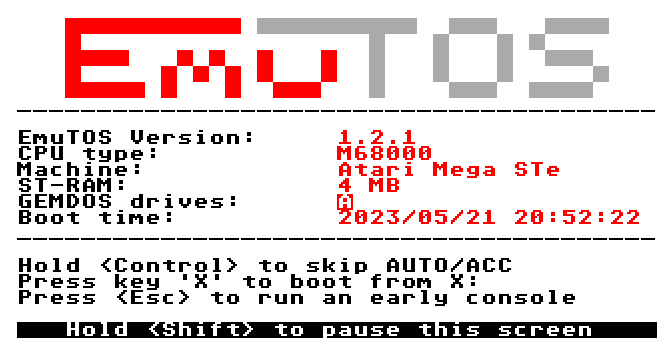
If you’re welcomed by those screen, you don’t have an official Atari TOS installed but EmuTOS, which is a free software version of TOS. It has many more features but unfortunately has the higher number of incompatibilities as well with software on floppy.
Can I upgrade/change the TOS version?
Yes you can, but since TOS is located in ROM chips on the motherboard, it’s less easy than just a firmware flash, since you need to physically change the chips.
Changing TOS ROMs
Here’s the compatibility chart with the native hardware, that is, without having to use third party cards:
Atari ST – TOS 1.00, 1.02, 1.04
Atari STF – TOS 1.00, 1.02, 1.04
Atari Mega ST – TOS 1.02, 1.04
Atari STE – TOS 1.06, 1.62, 2.06
Atari Mega STE – TOS 2.05, 2.06
On ST/STF/Mega ST, some boards have 6-chips TOS while some have 2-chips TOS sith 4 empty sockets. You can switch from 2 to 6 easily but going from 6 to 2 chips can be trickier.
On STE, it’s easier but some STE have EPROMs while most have ROMs, and there’s a few solder points to change when going from one to the other.
Check the forums or groups on Facebook to know how to upgrade your specific ST.
By using third party expansion cards or some hardware hacks, you can upgrade all ST models to TOS 2.06 or you can even put dual TOS. For example, the 1.62/2.06 dual TOS can be found in many upgraded STEs (1.62 for max compatibility with floppy software, 2.06 for the best Atari TOS available for this computer).
Installing EmuTOS
EmuTOS is a free software alternative to the Atari TOS with many interesting features and a better hardware support. For instance, it can detect and boot on hard drive automatically without any need for third party drivers, or handle natively some VGA cards. So, it can even be interesting to use it to do some hardware checks.
You can put it on ROM chips like Atari TOS, but there’s also a version that can be put on floppy or hard drive, to replace the Atari TOS at boot time. It eats some RAM but it could be worth it.
For example, if you have TOS 1.02 and want to check if your ST can handle a hard drive, you can load EmuTOS from a floppy and you will have a better hard drive support than with TOS 2.06!
TOS software patches
TOS 1.00 to 1.60 were known to ave some bugs, mostly related to disk and file access when using an HDD.
Back then Atari released a few software patches to be loaded at boot time. You can find a list on this page. But again, if you use an HDD, I strongly recommend to use TOS 1.04 or higher, or EmuTOS.
There are also third party software that replace parts of the TOS to enhance it (for example NVDI or TurboST to accelerate all GEM graphics).
Getting a better desktop with TOS 1.xx
One of the most frequent reason people switch to TOS 2.06 is to get the better desktop that comes with it.
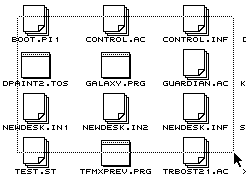
However if you have an earlier TOS version in ROM you can enjoy a more recent desktop by downloading TT_DESK.PRG and put it into the AUTO folder of the hard drive partition or floppy disk you boot on (if the folder doesn’t exist, create it). This is a preview version of the desktop that was released with TOS 2.xx and TOS 3.xx. It works perfectly under any TOS version, will happily replace the desktop of your TOS (that won’t be loaded at all) and provide the missing features you’re looking for without having to change your ROMs.
Note that it won’t change any limitation or bug related to the TOS located in ROM. For this reason it’s better to use this desktop with TOS 1.04 minimum.
Here’s the version I used during years on my STE: TT_DESK.PRG
(it’s sometimes also named NEWDESK.PRG)
What about the hard drive emulation? Is it easy?
All models of ST can use a hard drive (yes, even the first ST released in 1985). They all use the same connector and the same protocol called ACSI, which was losely based on SCSI – I’m leaving the details on purpose, but that’s the idea. The only model that doesn’t have an ACSI port is the Atari Falcon.
ACSI Hard drive emulators
So, you can get an original Atari or third party hard drive, but you can also use a modern ACSI hard drive emulation, which is a lot simpler and more efficient. There are many projects that do that but they work more or less the same way, and to be honest, the performance should be enough in any case :
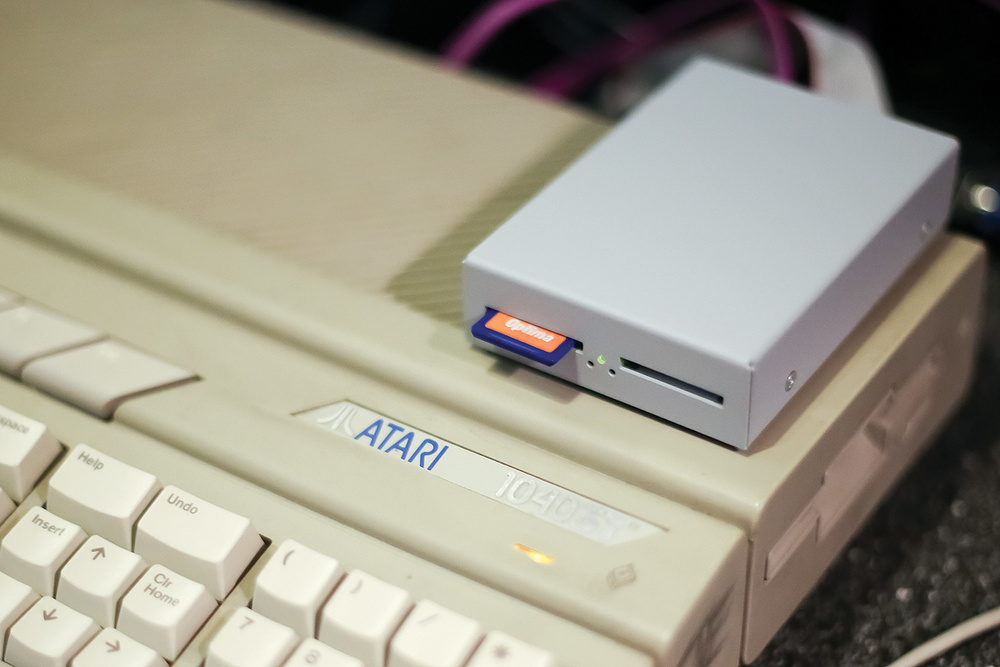
The main difference is the form factor, and also how they work. For instance the UltraSatan exposes the raw SD card to the Atari ST (so the SD card must be formatted at the ST format), while ACSI2STM can do the same or expose a file as a disk image.
It means if you want to plug the raw SD card to a modern computer, the ST format must be readable by the modern OS, while a file image must be mount on an emulator to be opened. Different issues.
Now, the first thing I need to repeat is: don’t try to use a hard drive with a TOS 1.00 or TOS 1.02. It will go badly. If you want to try without upgrading your TOS, put EmuTOS on a floppy disk and work with EmuTOS.
What you need to know next is that while TOS has all libraries/functions to access a TOS file system on a hard drive, it doesn’t have the low level functions to actually access the hard drive. They’re not included in the ROM package. Those functions must then be added to the TOS, and to do that you need… HDD drivers!
SCSI Hard drive emulators
SCSI is not used on ST except on Mega STE, because it was usually provided with an internal SCSI hard drive and a SCSI to ACSI internal converter card.
For this model, if the internal converter card is present, you can use BlueSCSI to replace the internal HDD. Here’s the setup to use, by Daniel Crugnola and Ian Montfort (source):
- Create a blank disk with Disk Jokey for Windows of the desired size (for instance 512MB)
- Put the bluescsi.ini next to the blank HDD image
- Very important for BlueSCSIv2: put the card’s jumper on TRIM OFF
- Install the card in the MegaSTE and start.
- To partition the card, ICD Pro and PPera’s driver works, AHDI doesn’t.
- Better use ICD Pro, Ppera’s driver has big slow downs when creating folders.
Note: no test seems to have been done with HDDRIVER, you may try with the demo version on your own.
bluescsi.ini contents:
[SCSI]
MapLunsToIDs=1 ; On
Parity=0 ; Off
Also many third party external HDDs were actually using SCSI drives with proprietary SCSI-ACSI converters.
HDD drivers
Unfortunately, they’re all third party software. The bad news is that the best are still pay software. The good news is that they’re still maintained.
You can chose between those three:
- PP drivers – 15€ – Strongly advised if you use only an SD card converter like those I listed above.
- HDDRIVER – 46€ – The most versatile drivers on Atari, supports all kind of media and protocols (ACSI as well as SCSI, IDE, Iomega Zip, etc). But takes more resources and you won’t use most of the features just for one SD card.
- ICD Pro – Free – Old drivers, will work if you don’t have any other choice, but not optimized or maintained anymore.
In addition, PP drivers and HDDRIVER can make partitions on the SD card in a way that they will be recognized by modern OS (they’re called TOS&DOS partitions), so you will be able to insert your SD card on a PC and just swap files that way.
Please note however that the TOS&DOS partitions of HDDRIVER and PP drivers seems to be incompatible with each other. So when you chose a driver, better stick with it.
And finally, I know that PP drivers also has a Long Name Filter (LFN) included, meaning that if you put a file named « yeah thisismypicture.PI1 » on a TOS&DOS partition, it won’t crash the ST and moving it around won’t corrupt the partition either.
(yeah, also… PP is the one who convert games for HDD. So of course he checks the game against his own drivers)
Installing a hard drive from scratch
Your driver is provided with at least those components :
- A program that contains the drivers, will detect the hard drive and make it available to the TOS
- A tool to format & partition the hard drive (usually, don’t format it: just create the partitions)
- A tool to install the drivers directly on the hard drive
What you need to do is put everything on a floppy, and run the first program (the drivers). Often it’s already located in the AUTO folder of the floppy disk, so the TOS will AUTOmatically runs it when you boot on the floppy.
Now the TOS knows how to access your hard drive, but there’s nothing on it.
So run the partition program, and create TOS&DOS partitions. The max partition size for TOS 1.04 is 256MB.
Please check your drivers’s documentation for this step.
Validate, and reboot on the floppy disk.
Now you need to manually mount the partition on the desktop. Create a disk drive (Option > Install disk drive) with the drive identifier C, and it should pop up on your desktop, and you should be able to create folders and put files on it.
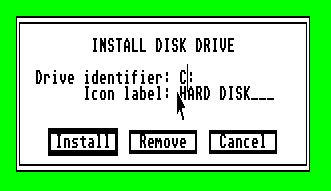
Once done, save the desktop (Options > Save desktop) so we don’t have to create that icon each time we boot.
But it will save the desktop on the floppy disk, so copy the file DESKTOP.INF it created on the floppy disk to the root of the C drive. If you use TOS 2.xx, the file is called NEWDESK.INF.
Now that’s good, but what we want is not to have to boot on the floppy each time we need to access the hard drive. Lucky us, when the TOS detects an ACSI device, it checks if there’s a « boot sector » (=bootloader) and if that’s the case, executes what’s there. So we’re gonna install the HDD drivers on the HDD’s boot sector… that’s a bit strange but that’s how it is.
The tool doing that can be a standalone tool (like with PP drivers) or included in the main program (HDDRIVER). It installs hidden data on the boot sector (outside the partition) but also often creates an additional system file on the C partition, that you must not move, delete or rename.
Once done, you can reboot without the floppy and the TOS should load the driver from the hard drive and boot from partition C.
What is the Atari STE « BAD DMA » issue?
Some Atari STE have problems working with hard drives because of an issue called « BAD DMA ». It does not affect other features.
It’s basically a hardware issue, and for a long time people thought it could be fixed only with hardware modifications (changing the CPU, etc).
Recent investigations showed that it could be fixed with a simple software workaround, which may or may not be implemented in future HDD driver versions. (as of May 2023).
Working with GEM
This section describes how TOS works when you use it from the GEM graphical interface. It more or less works the same way modern OS do but there are some traps due to the system’s age (things that we take as granted nowadays were not back in the day).
Basic functions
Undo
There is no undo function in the default GEM desktop despite all ST keyboards having an Undo key.
Multitasking
There is no multitasking in TOS. Only one program can run at a given time.
Each time you run a program, you need to exit it to come back to the previous program and run another one.
Note: some programs can allow to run other programs. But since you can only have one running program at a given time, again, you need to exit the last launched program to come back to the previous one.
Copy/Cut/Paste, and the clipboard
There is no universal clipboard in GEM, so copy/cut/paste support is a per-application basis and shortcuts often changes from on app to another.
So, as you may have guessed, there is no copy/cut/paste for files and folder on the desktop as well.
Copying, moving and deleting files
Drag & drop works between windows and folders and that’s how you move files around. However the behavior is a bit different that what you are used for:
- File copy is the default behavior when you drag and drop files (instead of moving)
- File move is achieved by holding the Control key when you release the mouse button
- File copy & rename is achieved by holding the Alternate key when you release the mouse button
The mouse cursor doesn’t change when you hold any of those key. But when you release the mouse button, a confirmation dialog opens and you can check if you triggered the behavior you wanted.

Select All Items
« Select All Items » was only introduced in the desktop of TOS 2 and is located under the « File » menu.
A keyboard shortcut can be configured for it in « Options > Desktop configuration ».
On TOS 1.x you need to lasso the files (hold left click and move the mouse around the files) or use Shift + Click to select multiple items.
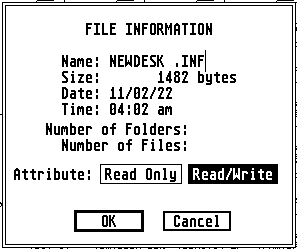
Renaming file and folders
Select the file or folder you want to rename and go to the « File » menu, then select « Show Info » or « Informations ». A dialog opens that allows you to rename the item.
Note: folder renaming is available only from TOS 1.04.
Deleting files and folders
Drag and drop the items you want to delete to the black hole trash. File delection is definitive.
A confirmation dialog pops up before destroying your files.
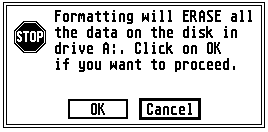
Formatting a floppy disk
Floppy disks need to be formatted to the TOS compatible format to be used on Atari ST. If it’s not the case, you can format the floppy disk by selecting it on the desktop and going to the menu item File > Format. A confirmation dialog will appear.
All contents on the floppy disk will be erased and cannot be retrieved.
Saving the desktop’s preference
Go to Options > Save Desktop.
If you booted from a floppy disk, it must be unprotected for the desktop to be able to save its preferences on it.
Usual programs and files
No installation is usually required to run a program. They’re standalone 99.9% of the time.
Usual GEM file types
.PRG (or .APP)
Executable file, can be a GEM program (with a GEM interface) or not.
When running a .PRG executable, its name appears on the top of the screen with the GEM background while loading is in progress.
.TOS
Executable TOS file, unlike .PRG they can NOT be programs with a GEM interface, but they can have their own non-standard visual interface. They can even be renamed .PRG without any issue :p
When running a .TOS file, the screen goes blank and a cursor blinks while loading is in progress.
.TTP, .GTP
Means « .TOS Take Parameters » and « GEM take parameters ». They’re the .PRG and .TOS equivalent for which you can enter parameters before it loads, much like command line programs on a modern OS. Some tools like LHarc require this.
.ACC
Accessory. It’s a small program loaded at boot time. (see below)
DESKTOP.INF (TOS 1.x) or NEWDESK.INF (TOS 2, 3, 4)
Contains the desktop preferences. Located at the root of the system boot disk (A: or C:).
You can save preferences by going to the Options > Save Desktop menu.
Other usual type of files
- TXT, DOC, NFO – Usually a text file, can be read by double clicking on it.
- PI1, PI2, PI3, PC1, PC2, PC3 – Picture recorded in Degas Elite format
- IFF – Picture recorded in Deluxe Paint format
- BAS – BASIC language source file (you need to find which BASIC though…)
- GFA – GFA BASIC language source file
- S – Assembly language source file
- RSC – Usually, a GEM graphic resource file
- MOD – Amiga music file, can usually be opened with ProTracker
- ZIP, LZH, LHA – Compressed file archive
- INF – Configuration file
- ST, MSA – Floppy disk image. Cannot be opened directly in GEM unless you have a virtual floppy driver loaded.
Boot sequence and auto-loading programs
Bootable floppy check + Hard drive check
When the TOS starts, it checks if a bootable floppy is inserted. If it’s the case it gives total control to that floppy. That’s how games and demos usually start.
But if that’s not the case (or if the bootable floppy contains a boot loader that gives back control immediately, like… a virus :p), then the TOS resumes its own boot sequence.
It checks if a hard drive is present. If it’s the case and if a driver is installed on the hard drive, then it loads and runs the driver, and then boot from C: partition (which is usually the first partition on the hard drive, but some drivers allows to temporary change that at boot time).
Note: on TOS 2 and above, you can hold the « Control » key to skip the HDD check.
Else, if no hard disk with installed driver is present, it boots from the A: floppy.
AUTO Folder
Note: on TOS 2 and above, you can hold the « Alternate » key to skip this step.
Next step is to check if a folder named « AUTO » is present on the boot partition (which is either A: or C:).
If this folder is present, it loads and runs all executable files present in this folder, in the order they were moved or copied into the folder (it’s not alphabetical order).
The AUTO folder can contain executables that do something and then quit like regular executables (for example a temporary configuration application), but it more often contains executables that stay resident in RAM once they’ve been loaded.
It’s very important in TOS for resident programs to be loaded the earliest possible in the boot process, because the TOS doesn’t have a modern memory management. Loading them later could result in a lot of RAM becoming unavailable.
It’s also in the AUTO folder that libraries or patches can be loaded to replace parts of the TOS located in ROM.
Example of such programs: NVDI to replace the TOS graphic libraries with faster ones, an upgraded file selector, patches to fix issues in TOS, a VGA or network driver, or even a full alternative OS that will never gives back control to the TOS in ROM (EmuTOS or MiNT do that).
It also happens that games or demos are just a single executable in the AUTO folder that never gives back control to the TOS boot process.
If TOS gets the controls back after the last executable in AUTO folder, it proceeds to load accessories.
Accessories
Note: on TOS 2 and above, you can hold the « Alternate » key to skip this step.
Accessories are tools with the .ACC extension located at the root of the boot partition.
They’re loaded by the TOS and stay resident after that. They appear in the « Desk » GEM menu below the « Information » item on the desktop, but also in every GEM program.
The usual accessory that you would find is CONTROL.ACC or XCONTROL.ACC that allows to setup a number of system parameters (windows color, system alert sound, keyboard click on/off, serial port speed…).
Note: On Mega STE, XCONTROL.ACC also allows to switch between 8Mhz and 16Mhz on the fly.
But since they’re resident and available in every GEM program, a lot of other tools were made to work as accessories. For instance, Kobold is a full file manager that also allows to format disks. M-Disk is RAM disk. 1st Guide is a picture viewer, Turbo ST a graphic accelerator…
Some of those tools can be renamed to .PRG to run standalone, or .ACC to be loaded as resident accessories.
Up to 6 accessories can be loaded at boot time.
Remember when I said above that the TOS wasn’t a multitasking system? Well, accessories are a kind of low-end multitasking, and they’re damn useful.
The only issue is that they take memory and never release it, so if a program doesn’t work because you don’t have enough memory available, you need to reboot and disable some or all accessories.
Once accessories are loaded, the TOS runs the desktop and the boot process is complete.
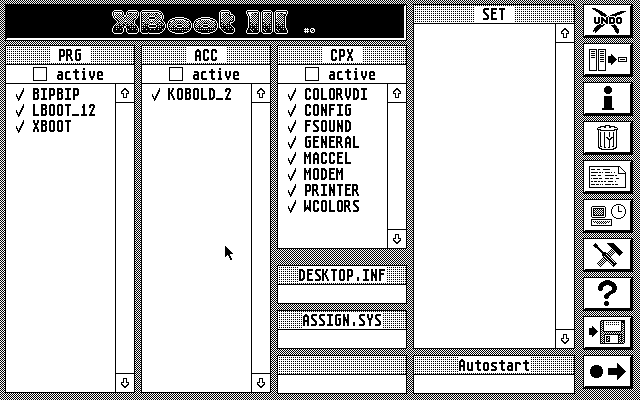
How to manage loaded programs at boot
Both the AUTO folder and accessories can be a pain to manage, because you need to either move the files out of the AUTO folder or to rename them with another exension to disable them (same for accessories) and you cannot easily reorder programs in the AUTO folder with the desktop (you need to create another folder and move files in the desired loading order, then rename that folder AUTO).
A few tools exist that allows to to all that automatically with a nice interface, the most used being Xboot. It can be put into the AUTO folder itself to be called during every boot.
How to transfer files from/to a modern computer
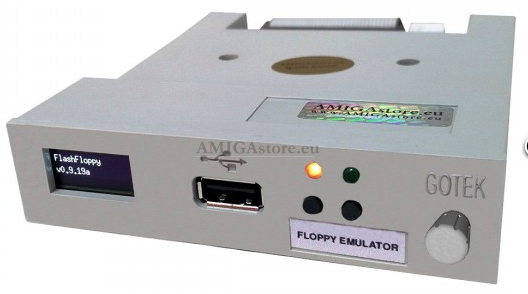
Gotek or HxC floppy emulator
You can replace the internal floppy disk drive with a floppy emulator, that will take floppy images (like .ST or .MSA images) and act as if they were real disks.
If you get a Gotek, better take one already flashed with HxC firmware or FlashFloppy firmware.
On the modern computer side, you can generate .ST files and modify their contents with an ST emulator like Hatari. Add a local file folder as a GEMDOS hard drive drive, insert the .ST file in the emulated floppy drive A, emulate any ST with TOS 2.06 and you will be able to copy any file from your hard drive to the emulated floppy.
You need: the Hatari emulator
Floppy disk, PC MS-DOS floppy disk compatibility
Of course, the main way of sending files to the ST would be to find a Double Density floppy, format it on a modern computer, putting files on it, then reading the floppy disk on ST.
TOS can read and write floppy disks formatted with MS-DOS, but remember the ST can only use Double-Density 720k formated disks, while the most used standard on PC was 1.44MB high-density.
You can format the disk either on MS-DOS or using the TOS desktop, but I found out that the best speed and compatibility is achieved when formatting the disk on MS-DOS.
Note: extended floppy formats that some tools can make (like 800k 10-sectors disks) are not MS-DOS compatible.
You need: a Double Density floppy (or a High Density one on which you hide/close the « HD detection » hole), a floppy disk drive on the modern computer, and one that works with DD floppies. USB drives may not work for that purpose, most of times they’re only compatible with 1.44MB floppy format.
Reading or writing any ST floppy from a modern computer
The Greaseweasle is a floppy interface card for modern computers. In a few words, it allows you to plug an old floppy drive (like the one you have in your ST) on your modern PC through USB.
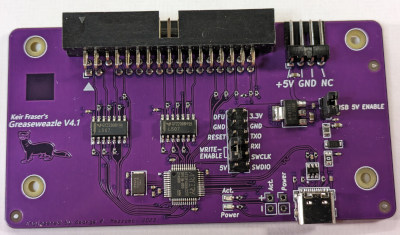
However the floppy disk cannot be accessed directly through your OS: the Greaseweasle is used to dump the whole disk in a disk image on your PC, to be read by an emulator for instance. But it can also write back a floppy image to a physical floppy.
So by using an emulator, you can actually make floppy disk images with files on it, and write back the images on a real disk.
You can also make real floppy disks of games and demos that you downloaded.
The Greaseweasle works fine with protected disks, so you can even dump your protected game for preservation and write them back later – that’s actually what it was designed for!
It also works for almost every kind of computers and disk formats.
This is the cheapest and most available floppy dumper, but there are other available for Atari ST disks. Kryoflux and Pauline are two other options, but more expensive or less available.
You need: A floppy drive with a real floppy connector (not USB), like the one that’s in your ST. So you can actually take the one in your ST if you don’t have another one.
Ethernet connection
USBee is a plug & play ethernet card that plugs into the cartdridge port of any ST and allows to transfer files easily.
You need: the ST ethernet drivers or client already on ST (floppy, ST HDD)
Serial connection
GhoSTlink allows to easily transfer files from a modern computer to any ST/TT/Falcon using a simple null-modem serial connection. It’s for MS-DOS but works under DOSBOX.
You need: a null modem serial cable, the ST client already on floppy disk or ST hard drive
SD cards as ST hard drives
HDD emulators can use SD cards as hard drives on ST (see above). Once you’ve formated them and installed the drivers on them, if you chose to make TOS&DOS partitions, you will be able to put the SD card on any modern computer and directly copy files on it.
Some HDD emulators allow to use HDD image files instead of using/formating the whole SD card. In this case, you’ll need to mount the ST hard drive image on Hatari and copy files on it using that emulator (just like floppy emulators, see above)
You need: a ST HDD emulator (see the HDD section above), TOS HDD drivers
Useful tools
- Xboot – AUTO folder and accessories manager
- ST-Zip – ZIP archiver
- LHarc – LHA/LZH archiver
- SYSINFO – Tool to list your hardware setup
- Kobold – File manager, works as PRG or ACC
- GhoSTlink – PC/ST file transfer through serial connection
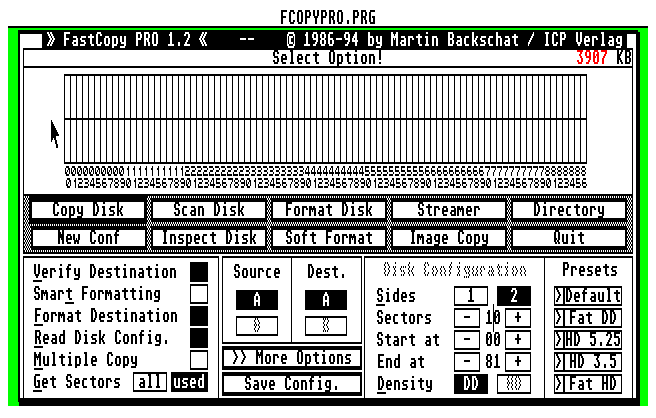
- FastCopy Pro – Floppy disk copier
- Magic Shadow Archiver (MSA) – Floppy disk imager (read & write)
- Pasti – Floppy disk imager (read only, may also work for some protected disks)
- XControl – Modulable control panel
- Protracker ST – Amiga « MOD » music editor/player
- Deluxe Paint – Drawing tool, can save as IFF format (supported by Photoshop)
Other links/resources
- Atari ST – History of the OS by F. Sagez and V. Rivière
- Atari Newcomers Help by Gunstick/ULM
- Atari ST beginners FAQ and basics by PP
- Atari ST Quick FAQ by DrCoolZic
- TOS images by Avtandil
- Adapted games for HDD by PP
- Hatari emulator
Documentation:
- Atari TOS on Wikipedia
- The documentation for TOS (advanced topics)
Social Networks:
- Atari ST group on Facebook
- Atari-Forum
Shops (hardware):
Recent HD drivers:
And that’s it, I hope I answered a lot of questions I already answered a 100s of times on Facebook (✿◕‿◕✿)